With all this rain (which is excellent!) we are having, sometimes you need a little sunshine and rainbows to brighten your day. Here in the Sacramento area, we have had rain every day for the months now! This mama needs some sun! This cute little DIY will do just that! Not only is it easy, buts its colors and simplicity will cheer up any corner of your little one’s room or even make a charming St. Patrick’s Day holiday decoration piece for your house.
See how to make it below!
WHAT YA NEED!
Yarn (any color of your choice!)
Rope
Hot Glue Gun
Sunshine and Cheer (You supply this, and it’s optional)
DIRECTIONS
OK, guys, this is a super easy project, and you just need a little patience and a movie to sit and watch while you do it or catch up on your reality shows)
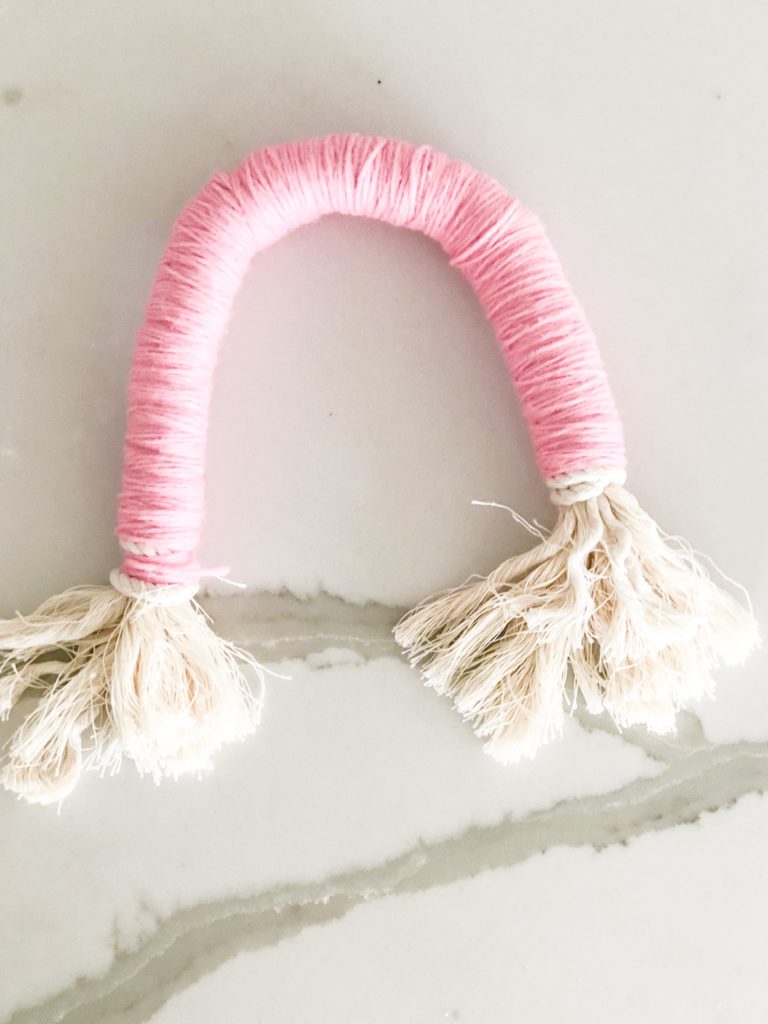
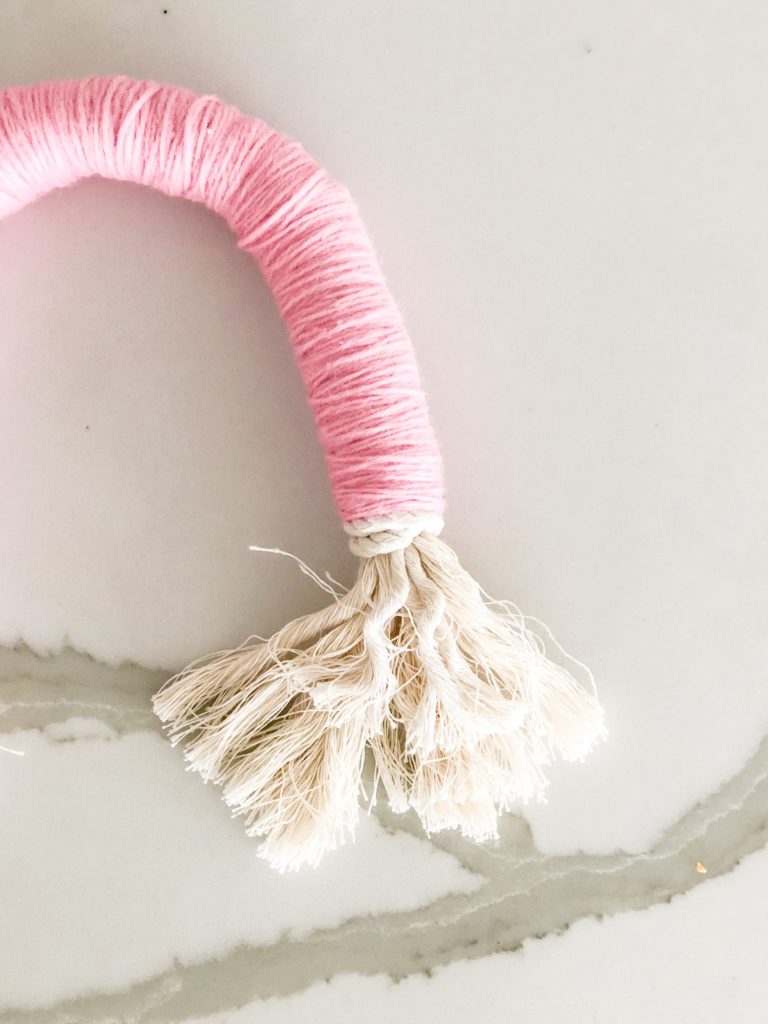
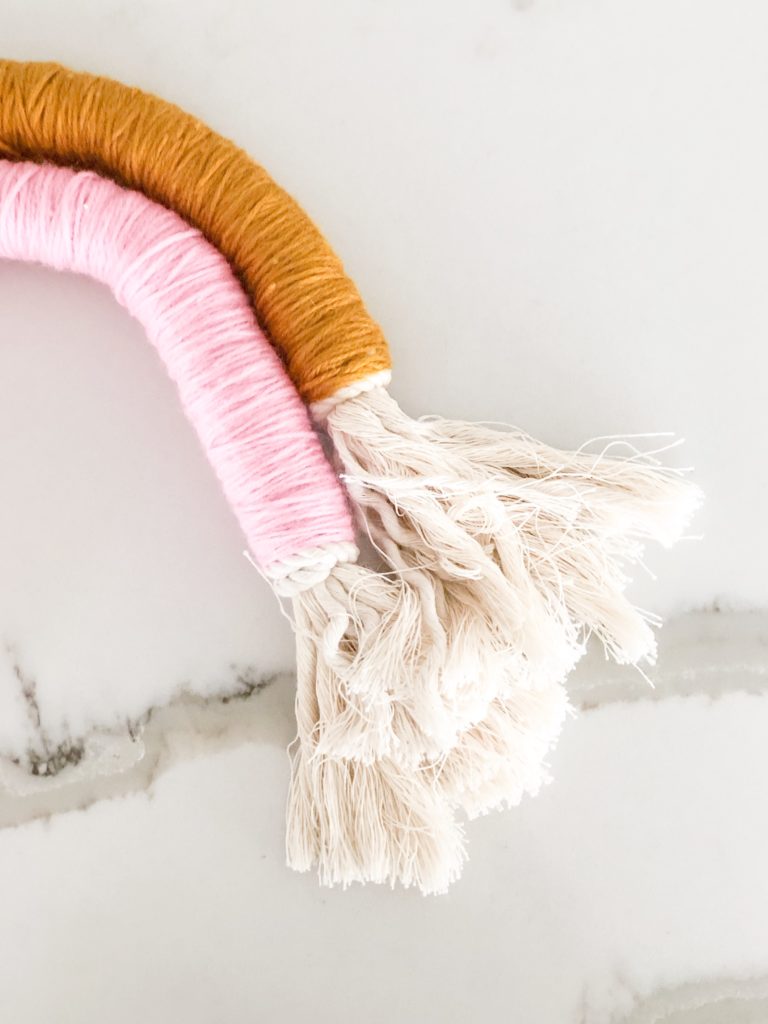
1st, the skeleton (or you can call it the body of the rainbow). This is made out of rope. I bought mine on Amazon. Duh, where else! You can go simple here, or get a little bit more creative. Just take your rope, and make three rainbow levels. At each end create a knot or take a piece of the rope and tie it off, leaving some extra rope so you can un-fringe it. Then I took another portion of the rope and twisted it all the way around to create another level. Here is what it looked like when I did the whole thing. This part might take a little patience and time, so don’t get frustrated. It took me a couple of times until I got what I liked.
*Beijos Tip: Remember, the skeleton of the rainbow gets covered in yarn, so it doesn’t have to look like this exactly! I like having the fringe at the bottom, but again that is entirely up to you! Take your time and twist out the bottoms so you can get that pretty fringe. I even used one of my daughter’s little doll combs and brushed out the fringe.
Next step, getting your colors in order. Pick your colors; there is no right or wrong color to use!
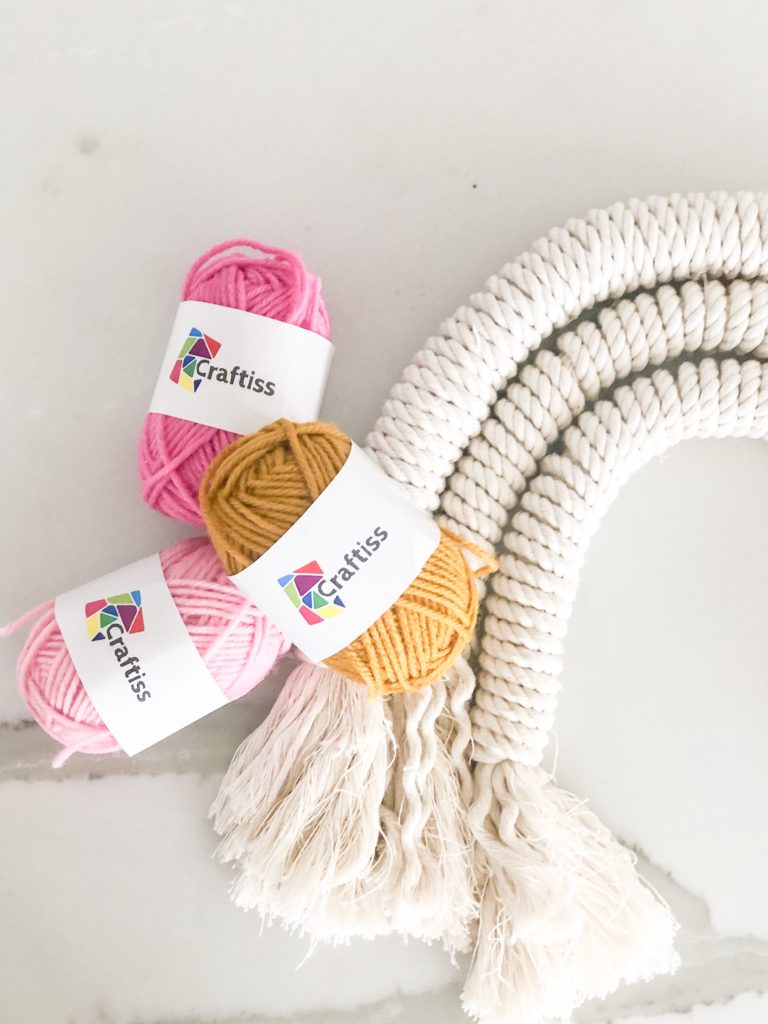 I found mine here, again on Amazon! It came in a large pack for more fun projects. Next, merely start winding the yarn around the rope. Wrap it around multiple times so you can no longer see any rope. Do this for all three levels of your rainbow.

 See just like that! Easy right? Now, continue with the other levels of the rainbow. You’re almost done! Yay!
 Still so in love with the combination of a mustard yellow color with pinks! I know it’s not the traditional green color for St. Paddy’s Day, and that’s why I love it!
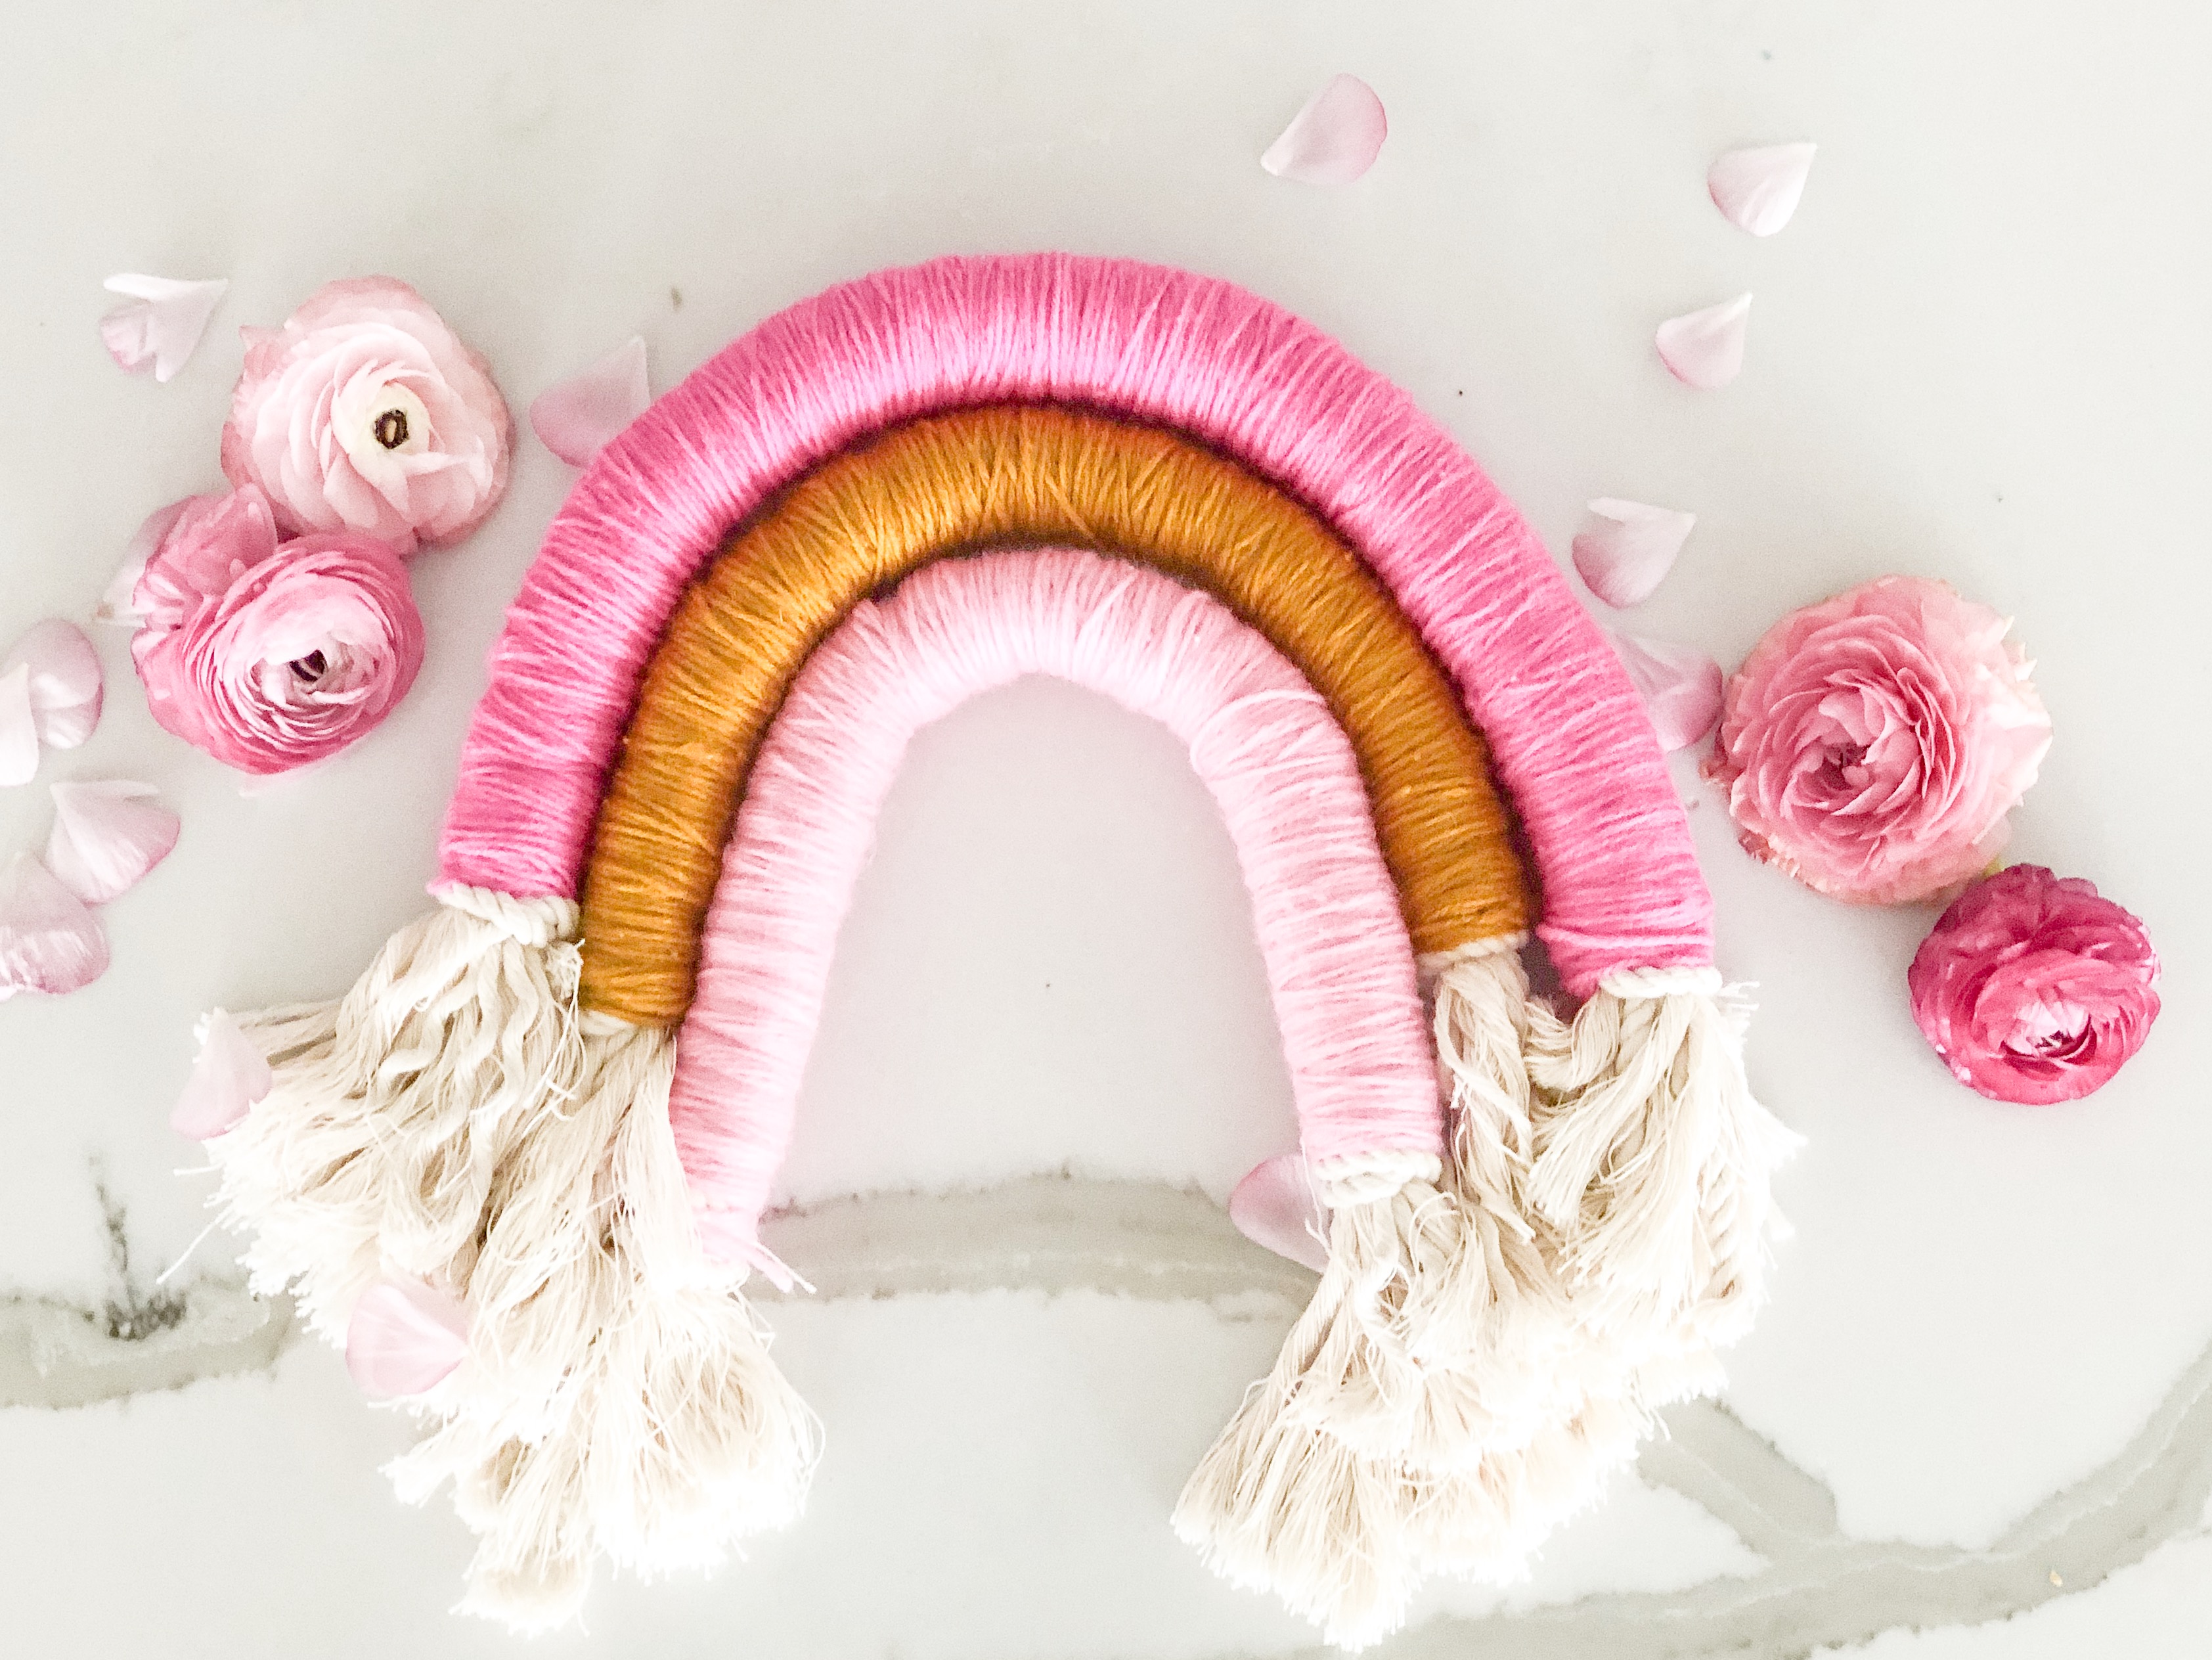
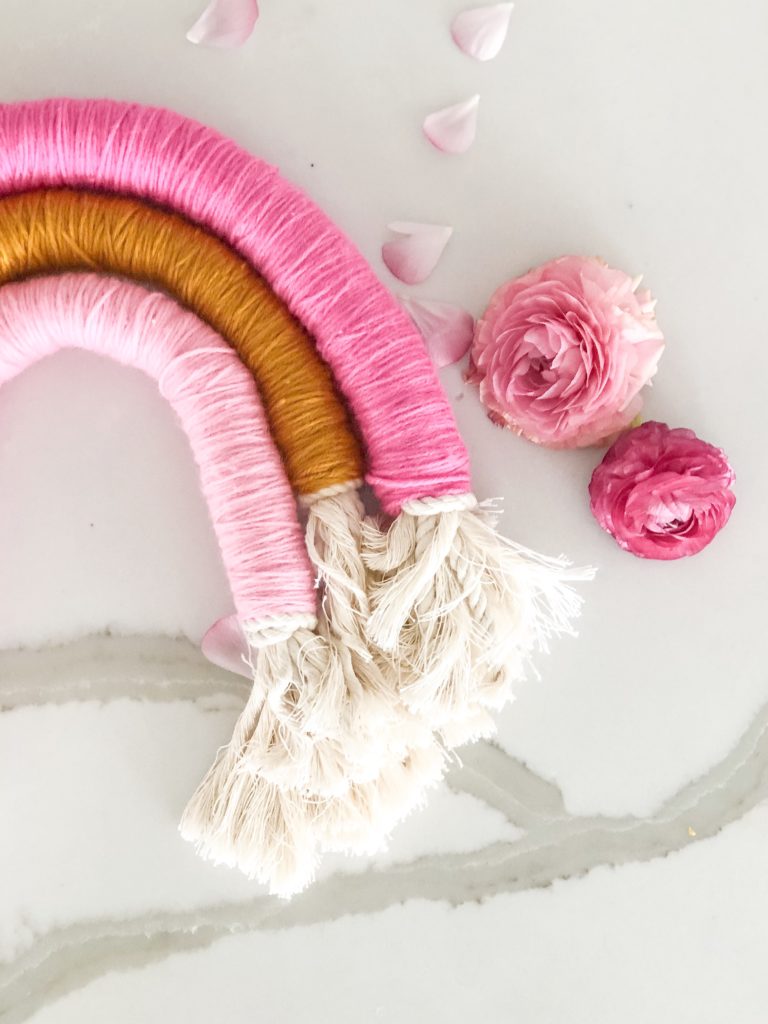
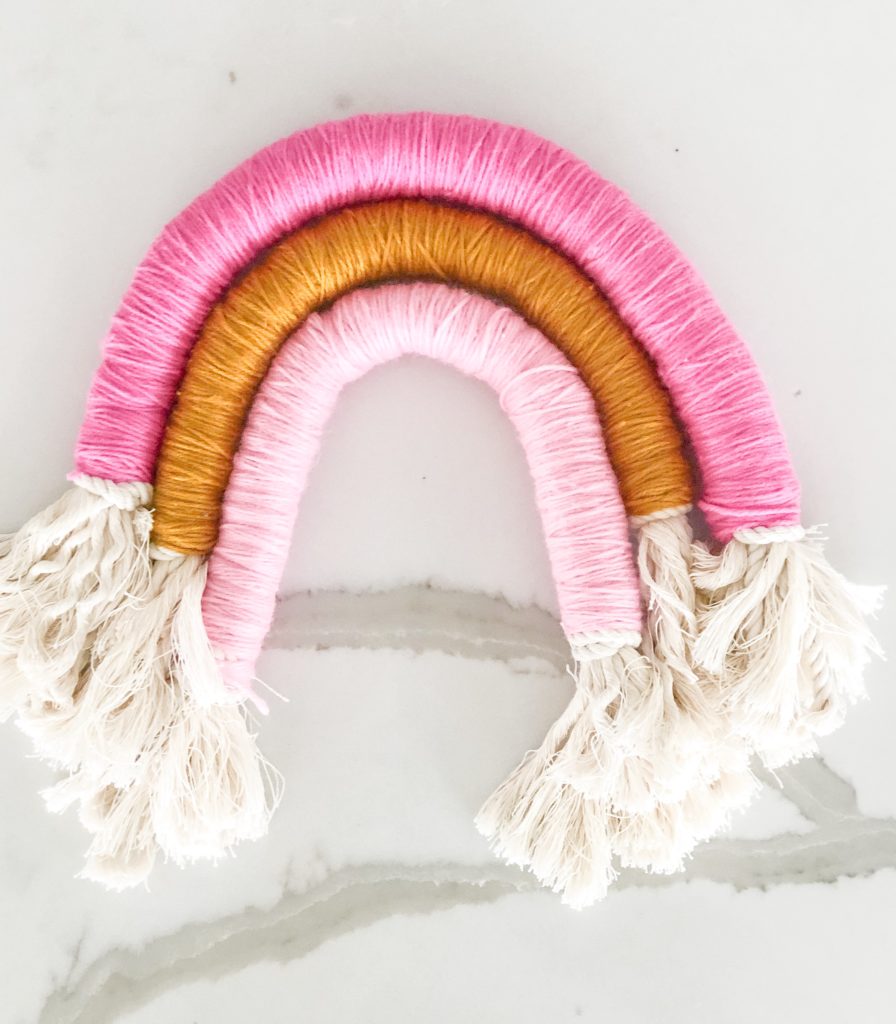 Here it is all finished! What a cutie! Lastly, just simply hot glue gun the pieces together and let dry. If you want to hang up, just grab a piece of leftover rope and make a little hook.
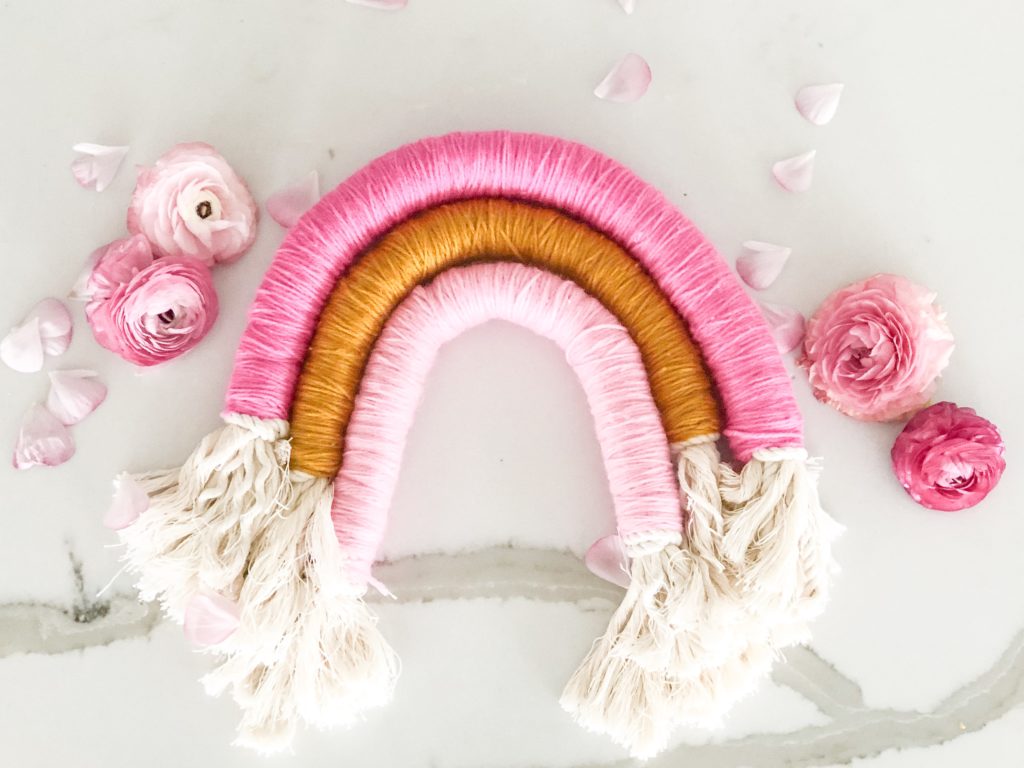
 Hope this brings some sunshine into your day!
Hello! I’d love to diy your rainbow! How much rope do i need and how thick does it need to be?
Thanks!
Hi!! Thank you so much! Oh boy it’s hard to say how much I used! I think I bought 10 ft of rope. I always like to have extra just in case too!