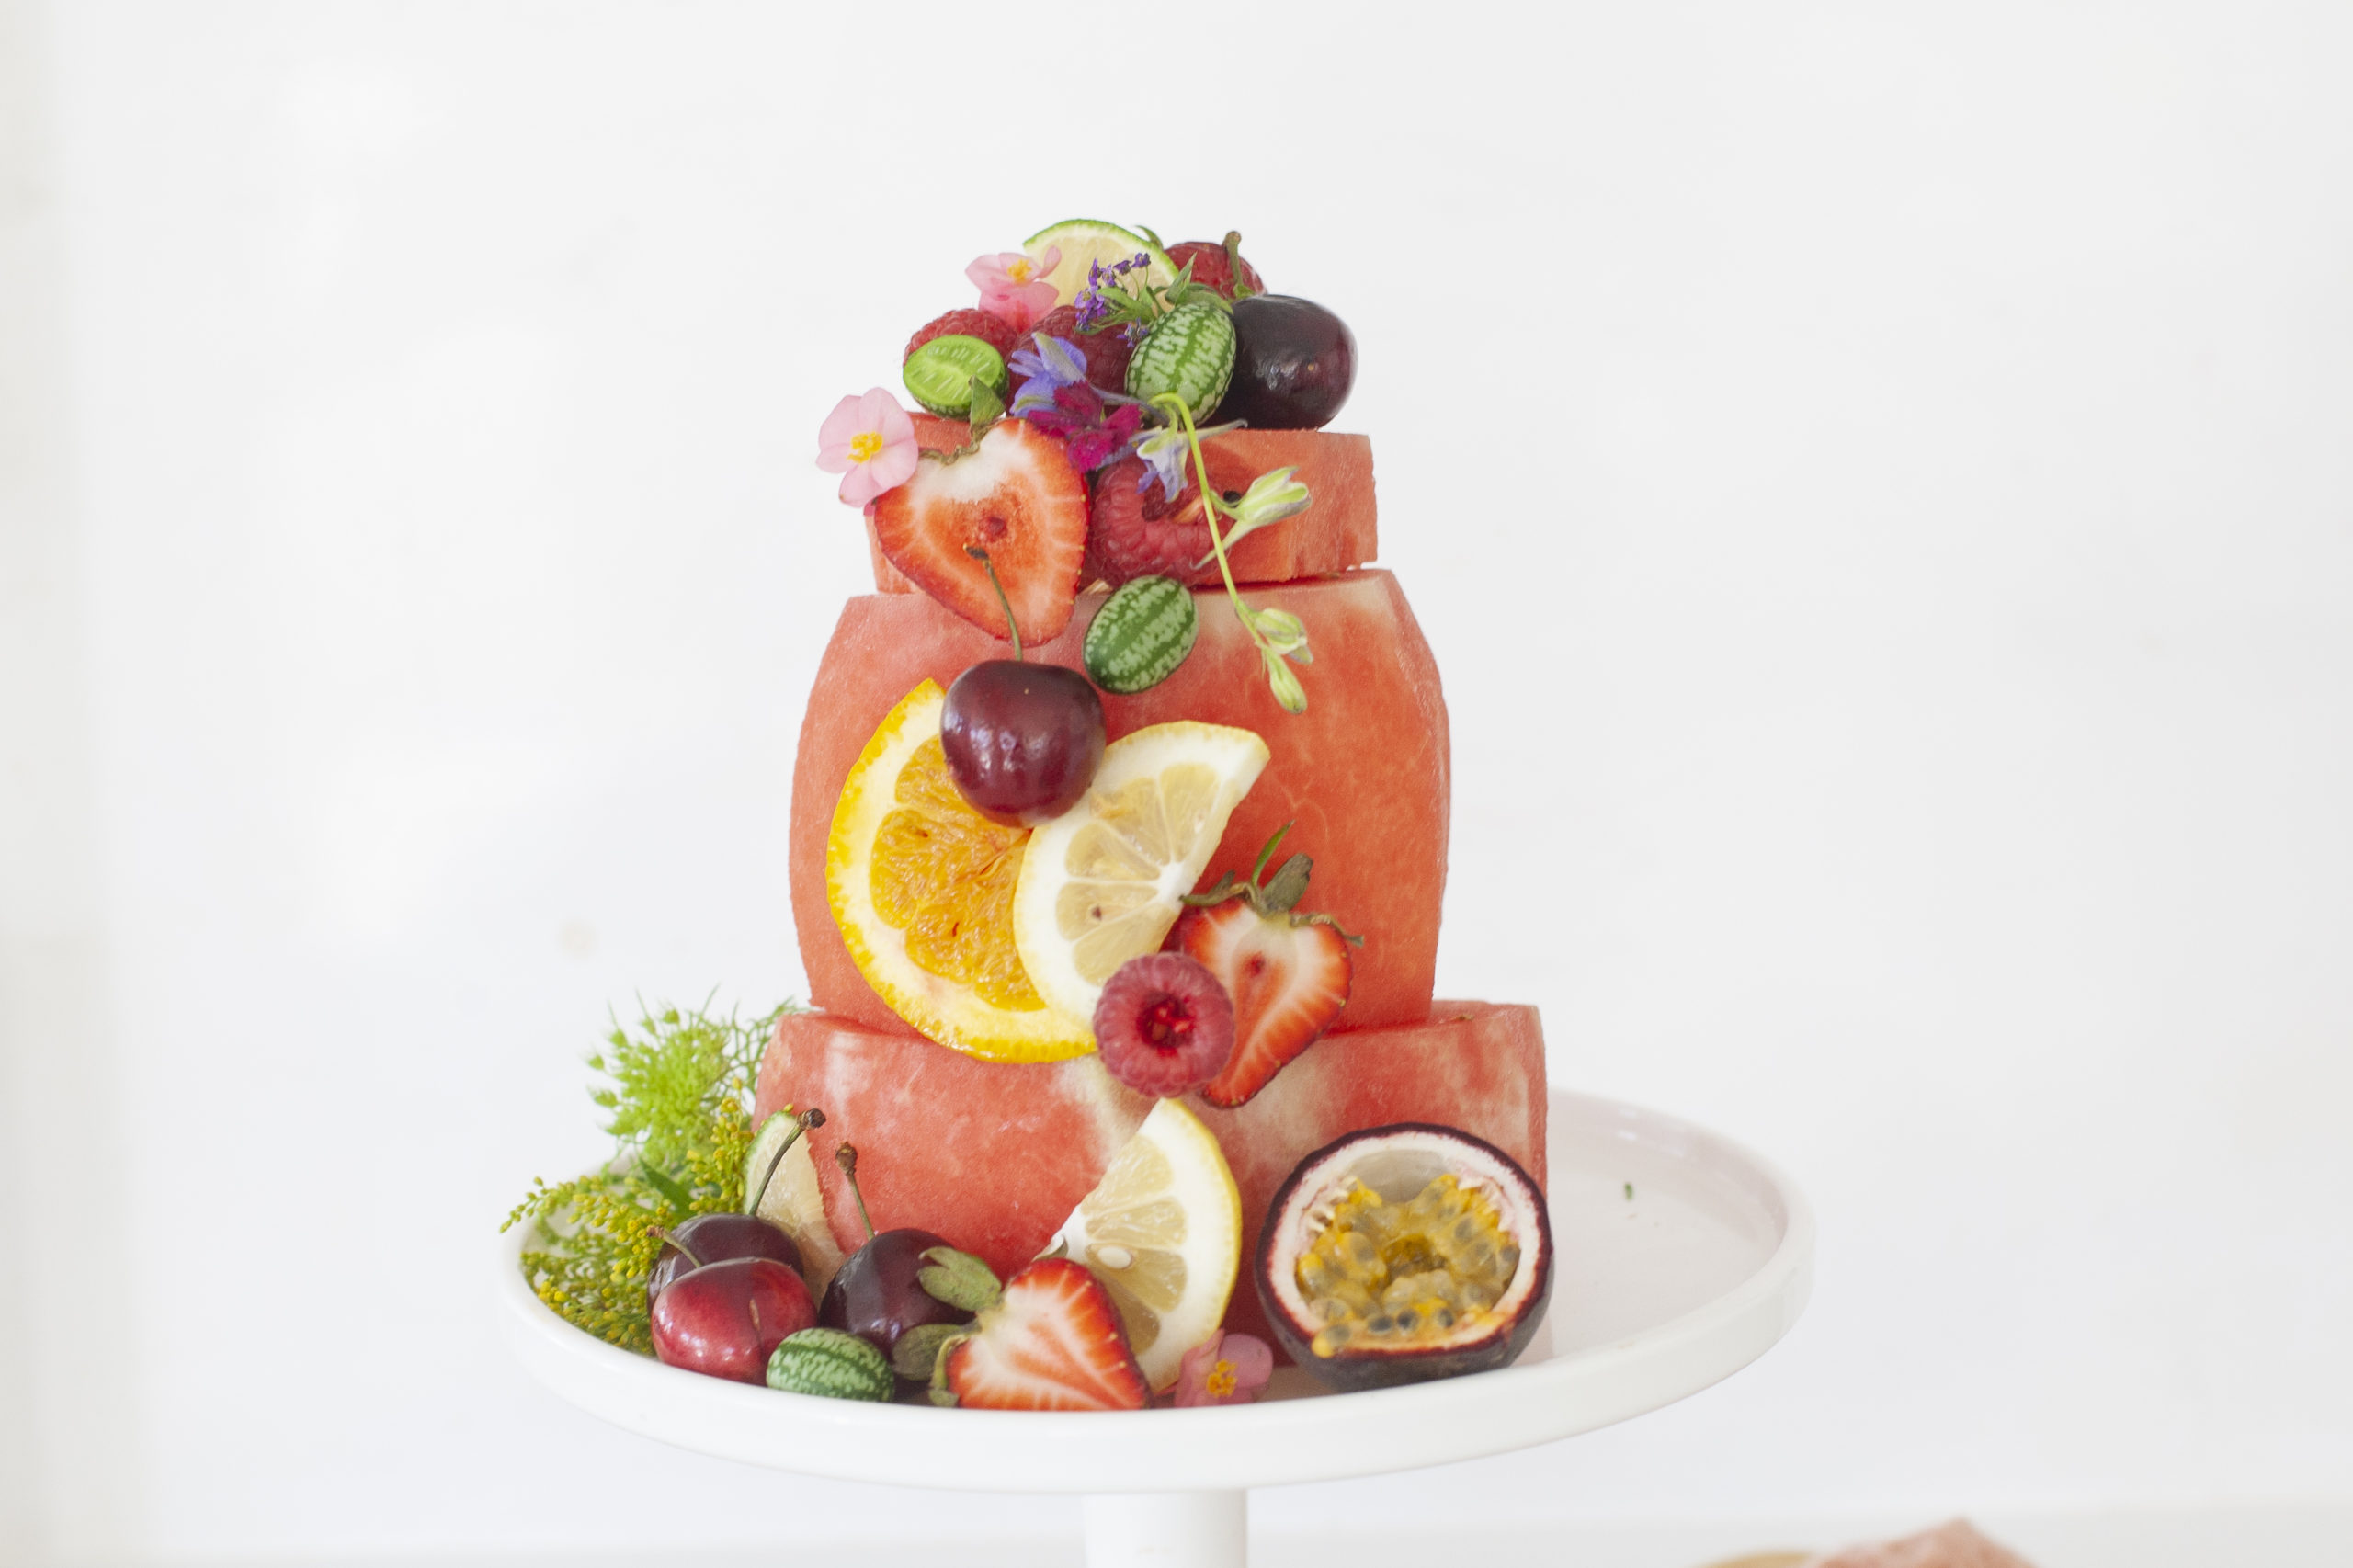
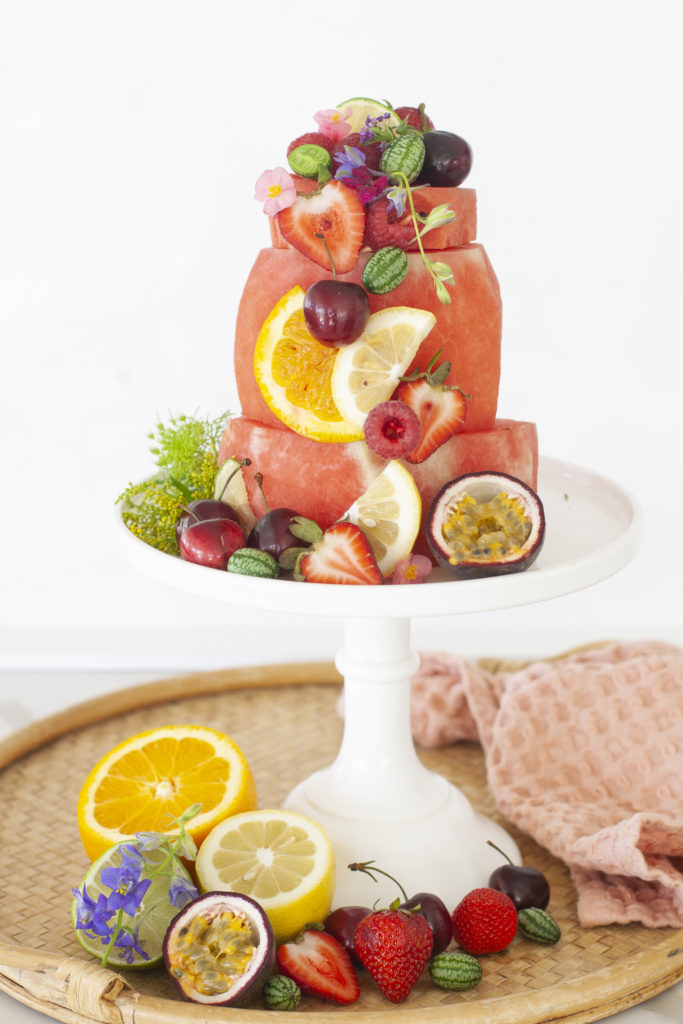
Well, guys, this is it! My summer officially ends tomorrow! The kids are starting their distance learning, and I get to put on my teacher hat once again. Little nervous to see if we can pull this off. But we’ve just got to stay positive thru all this, right? The weather where we live is straight up 100’s the past couple of weeks. So we have been consuming a lot of frozen fruits and treats to cool down. The kids wanted to celebrate the last day of summer with a little shindig with our little bubble of neighbourhood friends we have been quarantining only with. I thought to myself; you know what screams more like summer?? – Watermelon! I thought it would be cute to make a watermelon cake and adorn it with fresh fruits! The kids will love it! A quick little tip: When you make this, put it back in your fridge until you serve it up, that way it’s sweet and chilled. You could go one more step, and if you have room, in your freezer. The ultimate chill cake for the end of summer. I mean it will cancel out all the junk food we will probably give them for dinner. Ha! See below on how to make it! Happy end of summer, and wishing you all the best of luck!

WATERMELON CAKE
SERVES: 12 | PREP: 15-20 MINUTES | COOK: 0 MINUTES
W H A T Y A N E E D!
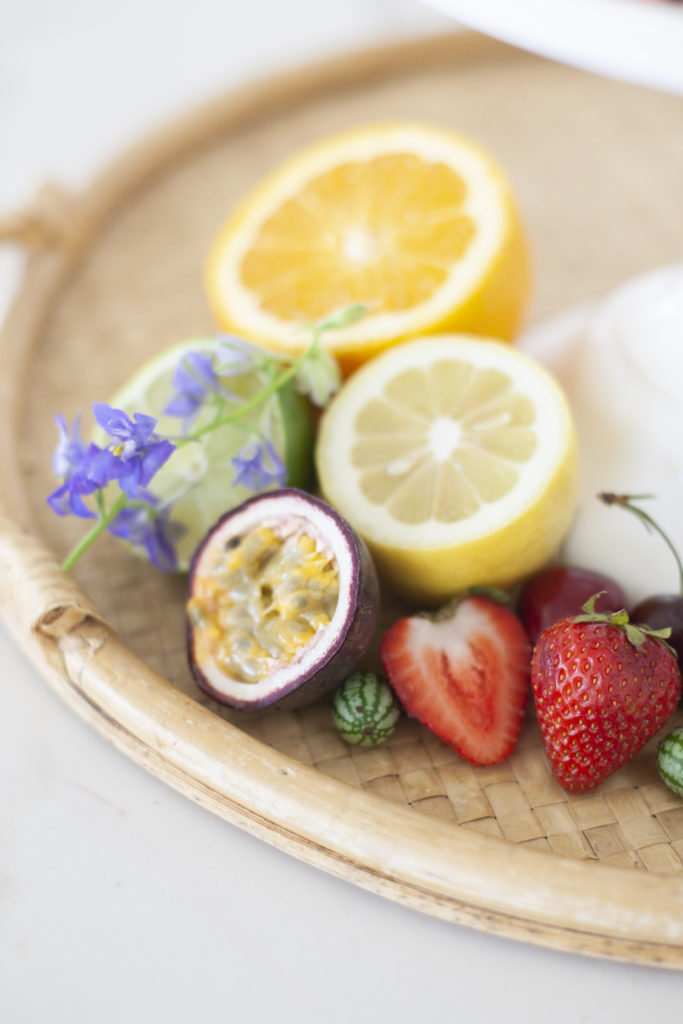
Assorted Fruit
Small Seedless Watermelon
Fresh Herbs/Fresh Florals
B U S T O U T:
Cakestand
Cake Dowels
Toothpicks
I N S T R U C T I O N S
Ok, so I will fully admit, I had to do a couple of tries and make the bases for the cake. I need to work on my watermelon carving skills. But what you want to do is create a tri-level cake with your watermelon. Carve the skin off the watermelon with trying to still have it have its round shape.
Once you have those layed out, connect them securely with long cake screwers. I used three in the middle to keep them secured to each other. Just think how they secure layered cakes.
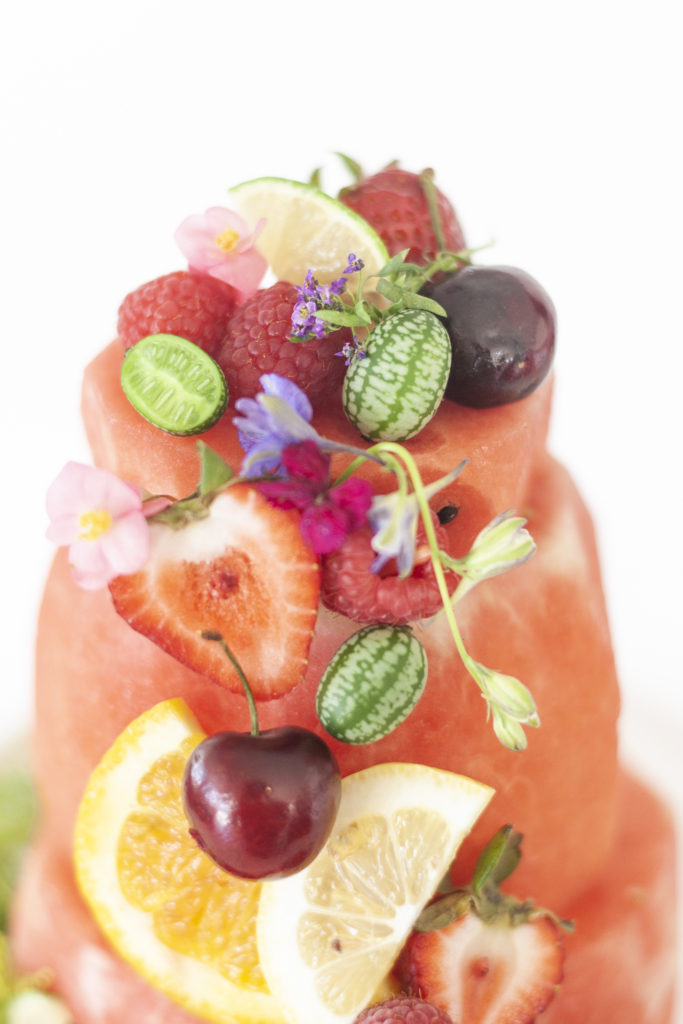
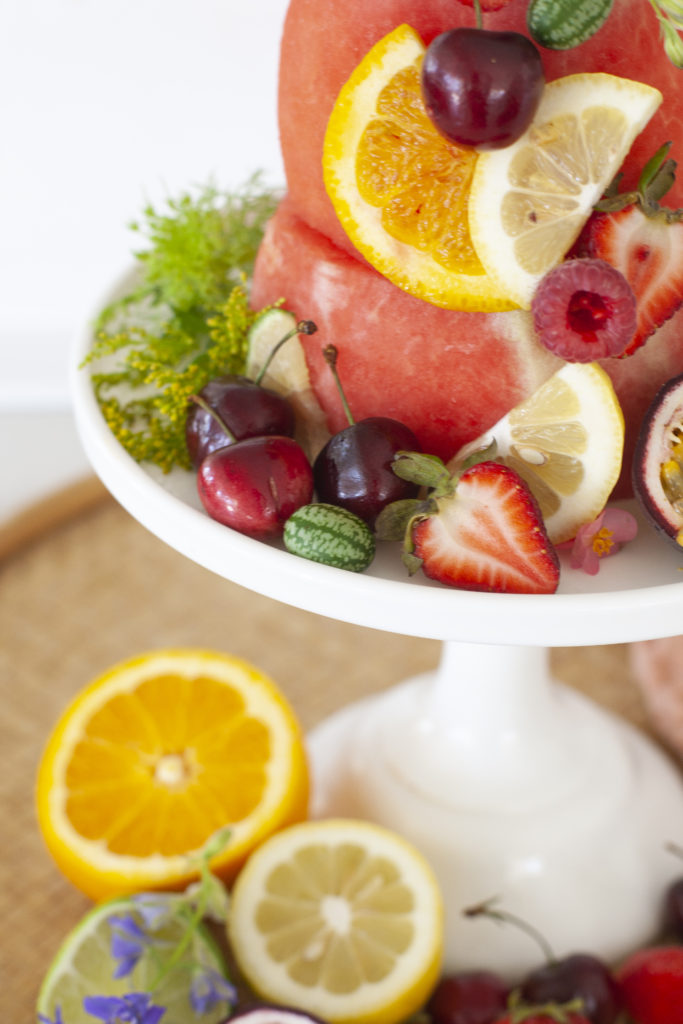
Once your base is ready to go, this is where the fun comes! I created a garland like effect with the fruit trailing down. I used small toothpicks and stuck them thru. Create different layers and textures with different fruits by layering them together in some parts, cutting the fruit open, and placing them on the base of the cake stand too. There is no right or wrong way!
Then simply, put in the fridge and bring out when ready to serve. If I had room in my freezer, I would have done that route, as that will create frost on the berries which a fun look. Dress it up with florals right before serving!


B E I J O S K I T C H E N

xx
Abby