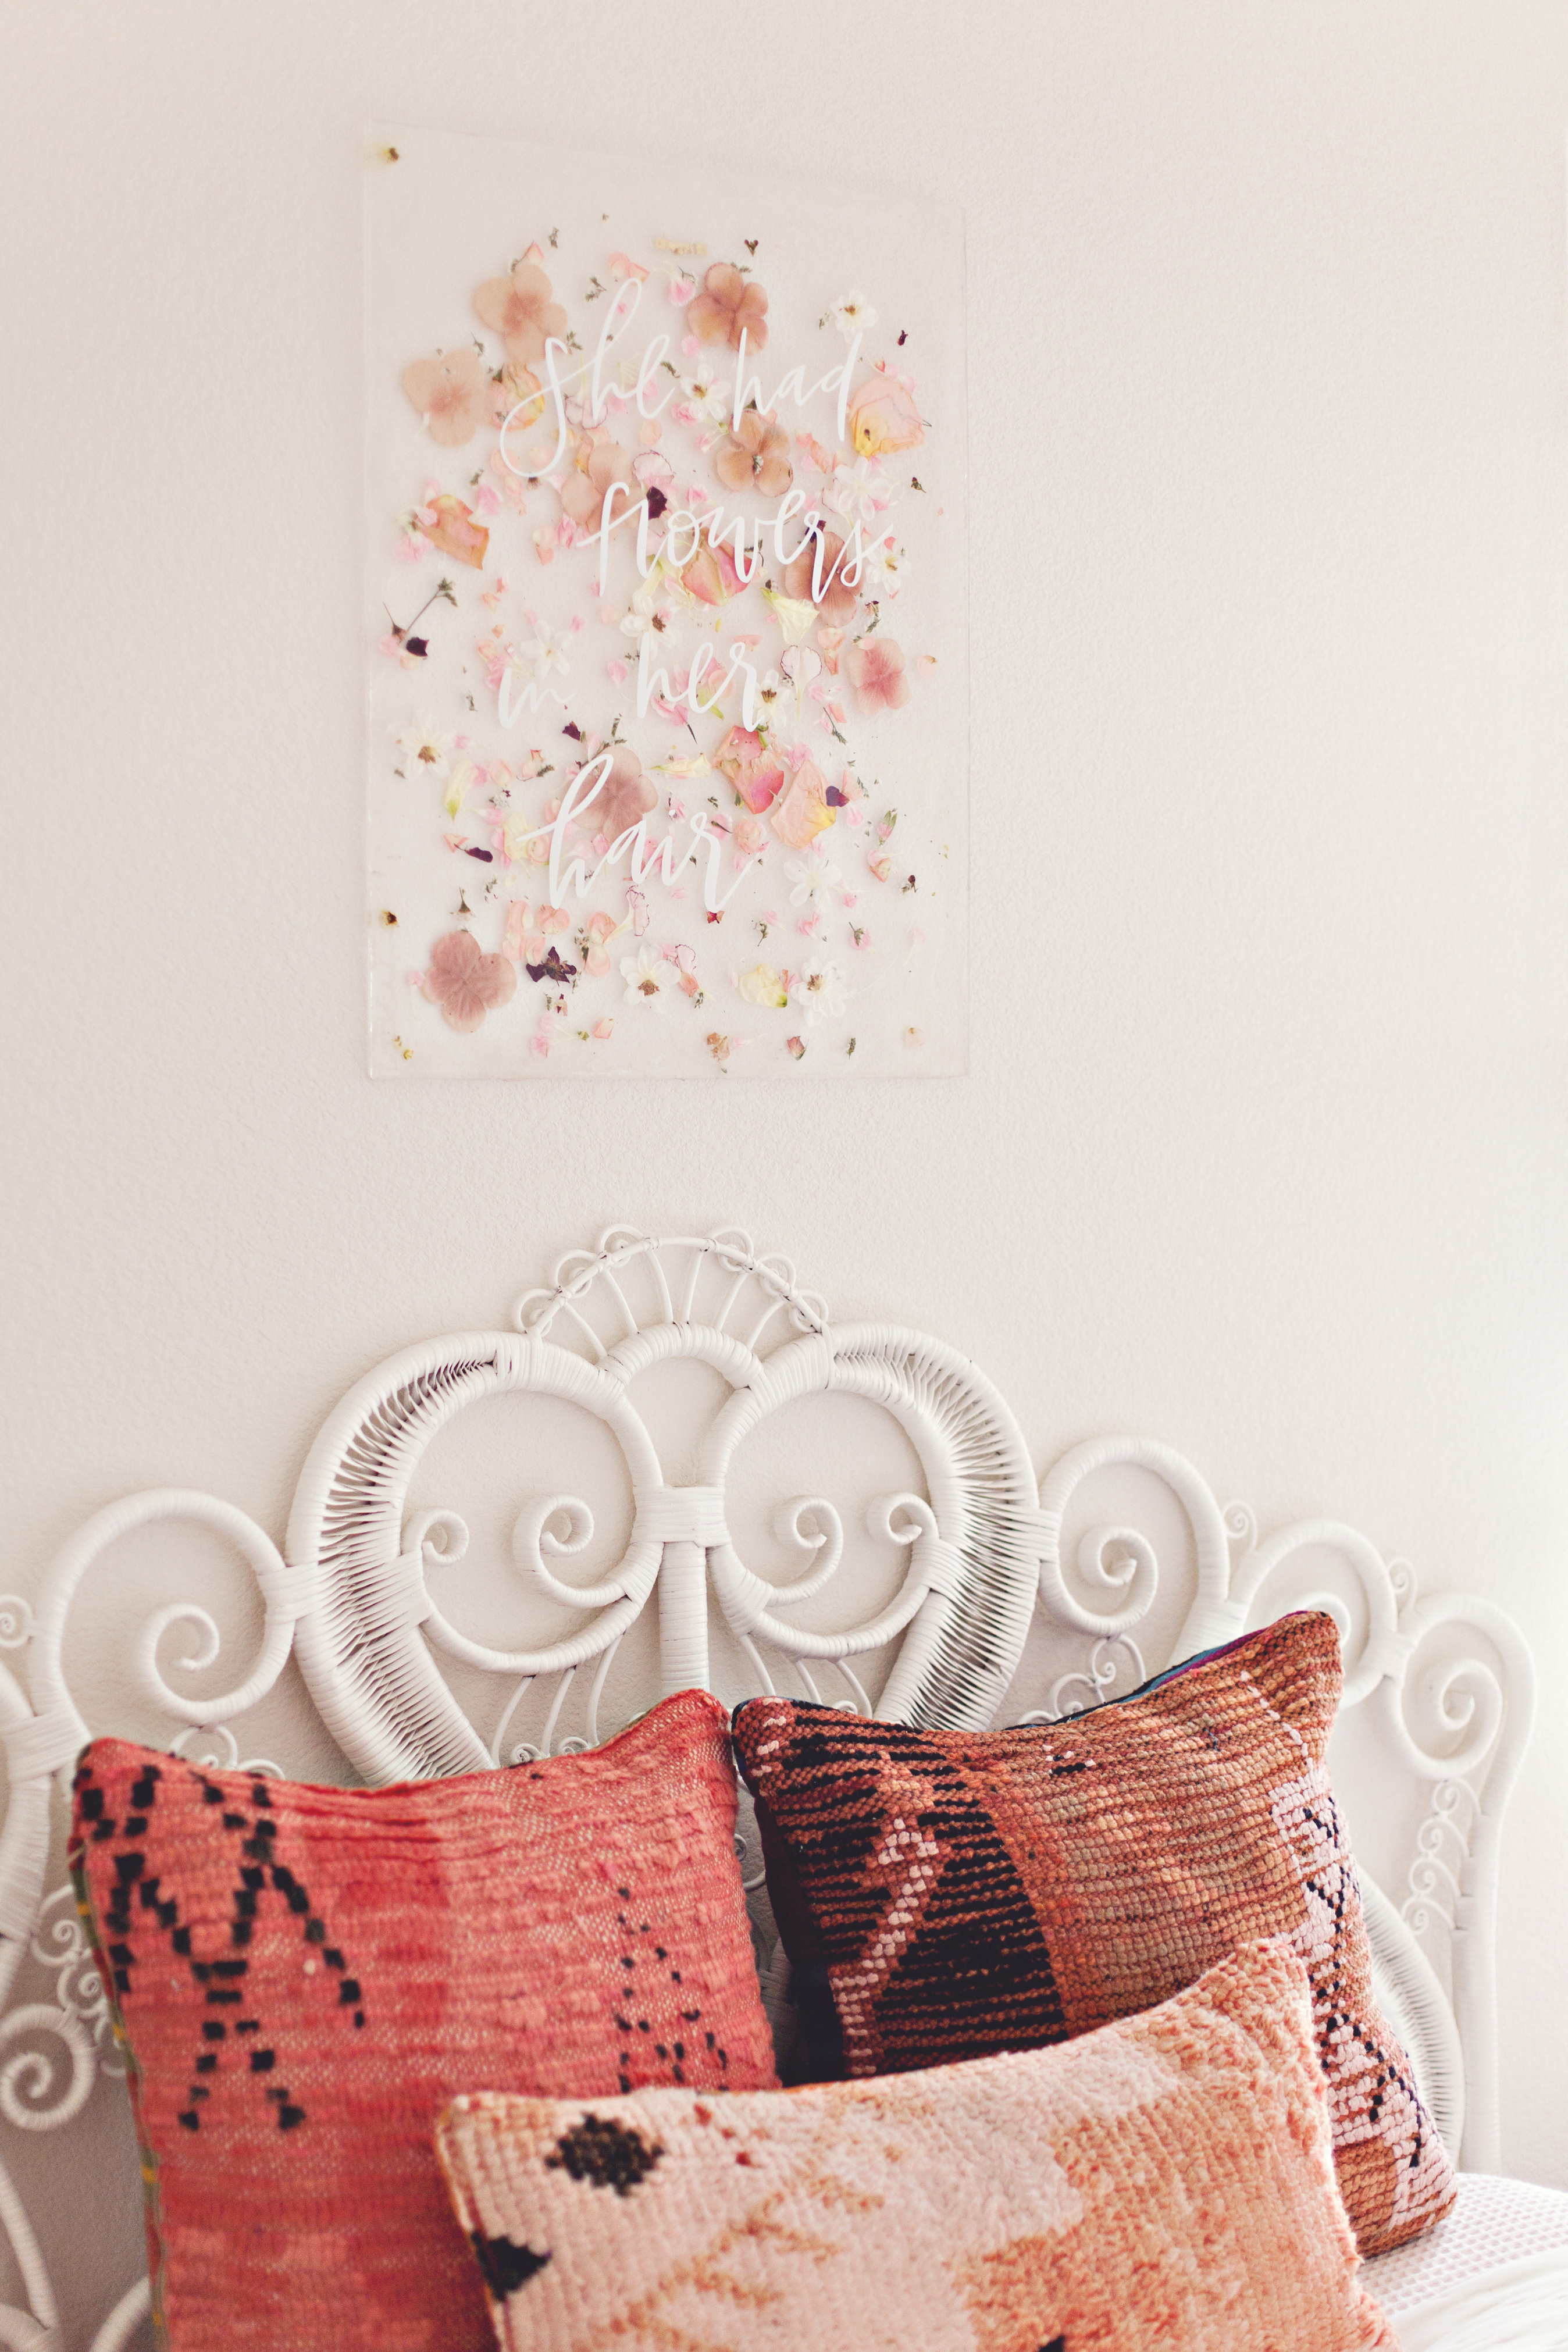
Being in a new house, there is A LOT to do! Every room needs love and attention. A little nerve-racking, but along with that there is so much excitement; it’s a blank canvas for you to make your own. I have been pinning ideas from Pinterest for what seems like a year of DIY ideas I wanted to TRY to do. One of the ideas that I saw a couple of years ago was from Chris Loves Julia blog. My husband believe it or not showed me this blog a couple of years ago, and I have been following them since. My husband secretly wants us to become this DIY couple. But if that were the case, you would see one project or two done once a year, ha. Chris and Julia have some great DIYs for your home. One that stuck out to me was an acrylic gallery wall filled with black and white photos of their family. I loved the idea of doing something with acrylic for my home. Along with my love for acrylic, I wanted to incorporate flowers as well. There was no other place then my daughter’s room to place this custom piece.
A while ago, my dear pal Meghann Miniello created a word phrase for me for my daughter, Dylan’s room that I was going to make a neon sign with. The prices of neon signs are kinda pricey, so I tossed out the neon sign idea and created this acrylic pressed flower art piece for above her bed. I have to say I think it came out pretty cute! And even better, it was easy to make. No power tools needed! Although reinforced hanging is always a plus!
Photos by Jessica Erickson
 S U P P L I E S
Vinyl Sticker Lettering or Calligraphy skills
2 Acrylic Sheets (any size you want)
Flowers (Dried or Real or Both)
Gorilla Epoxy
Picture Backing + Nails
Hammer
Cameo Machine
Clamps or Heavy Objects
 1st let’s discuss acrylic. You can order yours thru Amazon or go where I get all my acrylic thru Tap Plastics. Straight to the source. Remember the larger the piece, the more reinforcement you will need for hanging. I went with 18X24 sheets. Tap Plastics will deliver to your house, or if there is a nearby store, you can pick up that day.
Next up, the writing. I choose to use vinyl lettering since my calligraphy skills do not need to be seen around the world. Meghann Miniello created my phrase, and I took her file and created a vinyl sticker using the Cameo machine. This machine is a game changer if you do a lot of projects with lettering for stickers, shirts, signage, you name it. Definitely worth it!
Lay the wording out on the acrylic sheet where you desire. Then once you have them in their desired spot, do each word at a time. You just peel back the backing and place the vinyl on the acrylic, and then SLOWLY peel the front clear sheet up, at the same time making sure the lettering is adhering correctly to the acrylic.
The fun part. The flowers! I used a mix of real flowers and silk flowers. I had a particular color palette in mind but had trouble finding the colors I wanted at my local market. This is where I added some silk flowers, and it helped me achieve the colors I was looking for. Also, another thing to remember is when you use real flowers they will become dried flowers so the color will change. Sprinkle and place your flowers where you desire.

 Grab your other acrylic sheet, and begin placing the flowers on top of it. I just tossed them about and moved them around to cover some empty spots. Feel free to get creative and do some pattern or design with the flowers. You can also use greenery as well. I wanted the flowers to be the backdrop, so I went a tossed look. I did place my silk flowers in certain areas.
*Tip- Place your acrylic that has your lettering on it and place it once in awhile on top of your other board with the flowers to see how it will look once you combine the two. You can adjust as needed.
Pretty easy right? Ok, let’s get to the hard part. But you can do this!
Epoxy is something not to mess with once it’s mixed. So be cautious with this and its a good idea to do this part outdoors or in the well-ventilated garage. Follow the directions on the glue, and once mixed, place a thin line towards the edge on one of the sheets, the glue will dry clear. But if you use a lot, its ok, cause once it’s hung up, you really can’t see it. Place the other acrylic sheet on top and make sure its aligned correctly. Using clamps or heavy objects set on top of the layers and allow it to dry for an hour to set. I let mine sit overnight. Be sure all the corners and sides are pressed down with something substantial, or they will not seal properly.
Finally, adhere the picture backing to the backside with either more glue or you can drill one in. Once thoroughly dried, you can hang it up!


 So cute right?!
xx
Abby
LOVE! Is it easy to transfer the lettering so it doesn’t fold over or bubble?
You know it’s a funny thing, sometimes it’s super easy and sometimes I have to do it’s couple times! Can’t always be perfect all the time huh! Ha!