
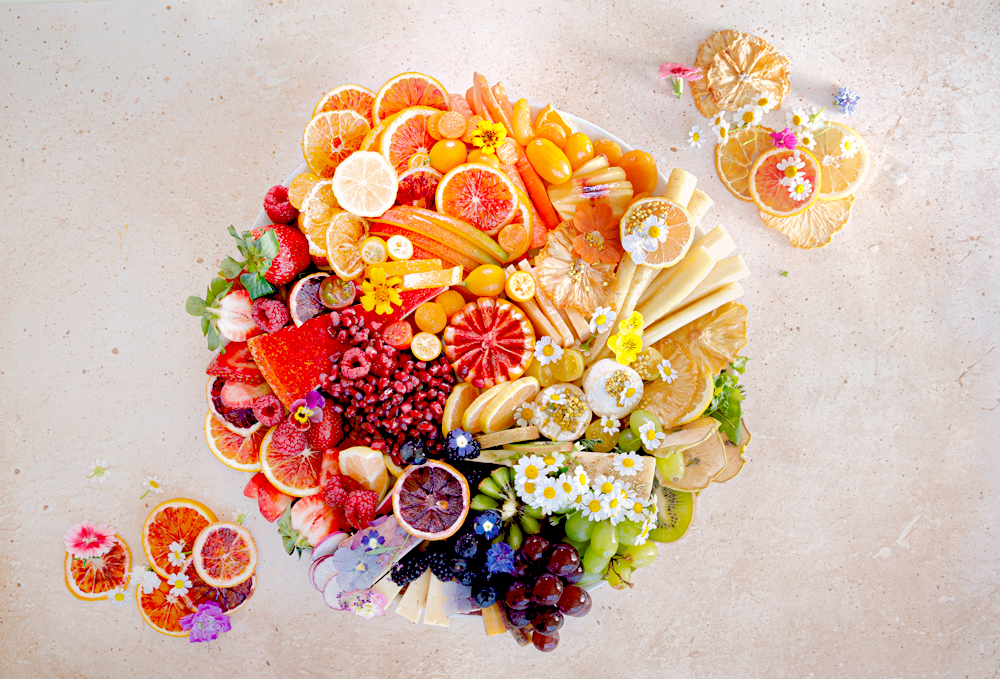
Are you looking to elevate your everyday charcuterie board? Well, good thing you are here today! We teamed up with Harry and David to show you how you can raise the bar on the common charcuterie board and create this pretty rainbow number just in time for St. Patrick’s Day and Spring! In my opinion, there is nothing better than a tray with loads of juicy and tangy fruit alongside yummy veggies and a few camos for the cheese lovers. Take it up another notch, by arranging in a rainbow color scheme, and adding lots of edible flowers and dried fruit. Whip up this pretty number for your next get-together!
Photos by Dayna Studios

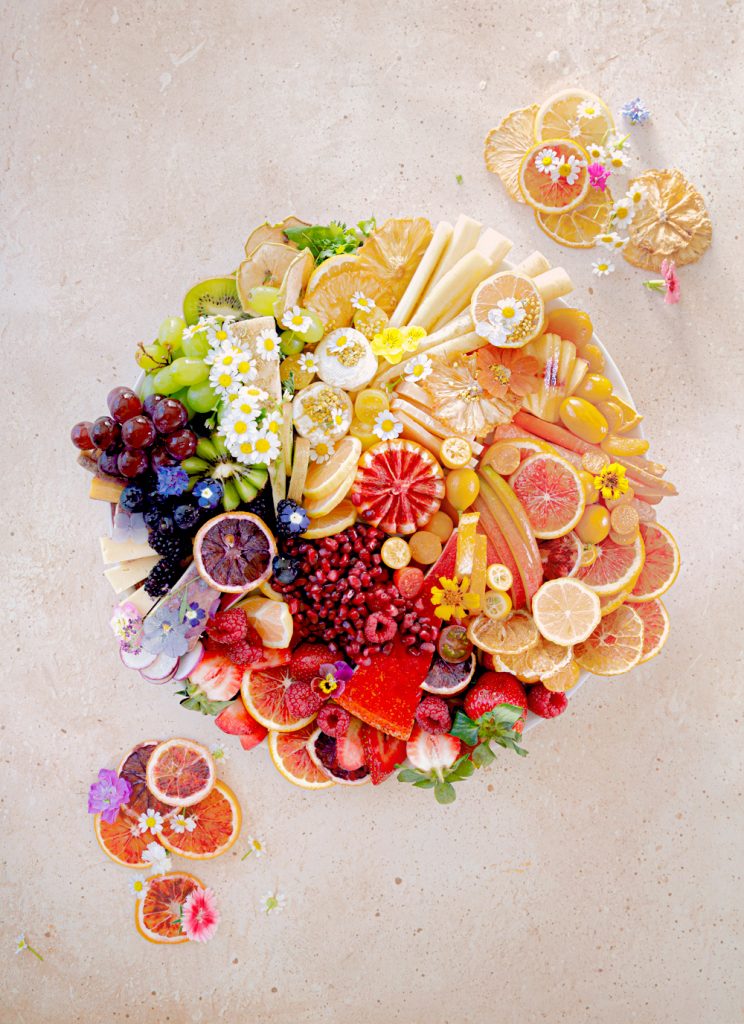
RAINBOW CHARCUTERIE BOARD
SERVES: 8+ | PREP: 20-30 MINUTES | COOK: 0 MINUTES
W H A T Y A N E E D
Various Fruits
Various Veggies
Various Kinds Of Cheese
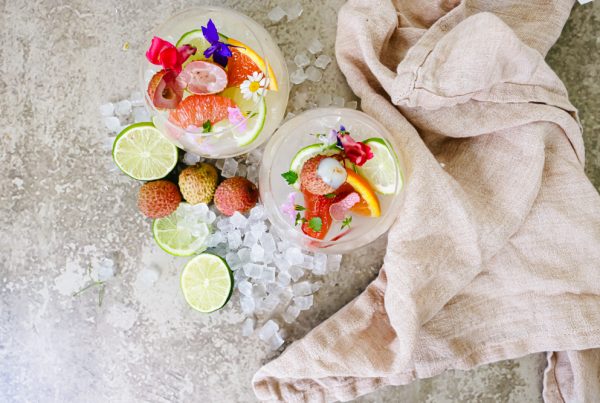
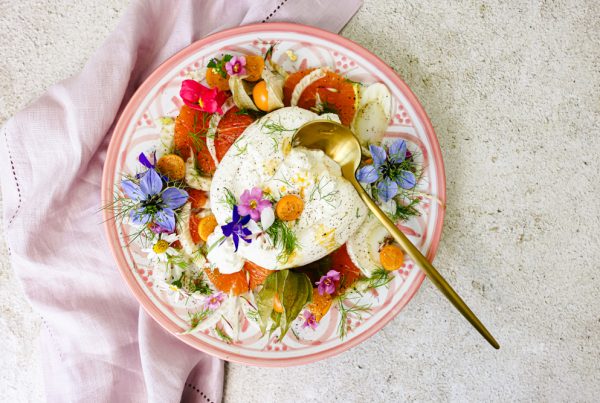
Edible Flowers
Dried Fruits
Fruit Crisps
Dried Flowers
Bee Pollen
B U S T O U T
Platter (any kind of serving tray will work)
I N S T R U C T I O N S
STEP ONE: Grab A Platter
You obviously need to put all your goodies on, right? You can go small, medium, or large! And to be honest, it really doesn’t matter the size, shape, color, etc. As long as it’s sturdy to hold all your goodies, you are golden. I used a large white round platter from Crate and Barrel. I do enjoy the fact that this platter had a lip to it, so none of the items would spill over. That can happen sometimes with a flat serving board. See more options that I love as well!
SHOP PLATTERS

STEP TWO: LET’S GO SHOPPING!
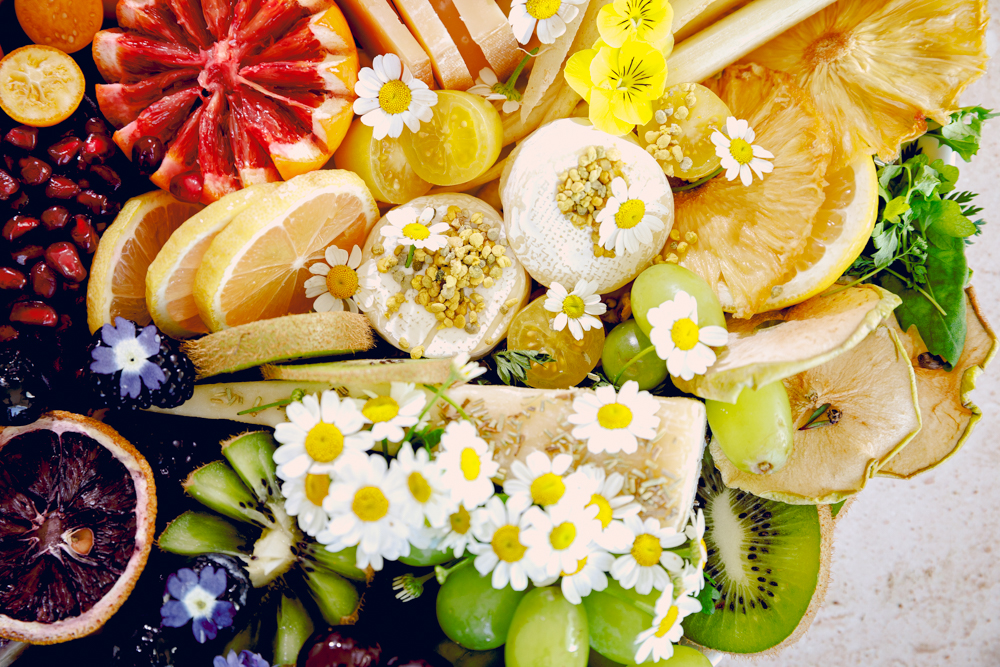
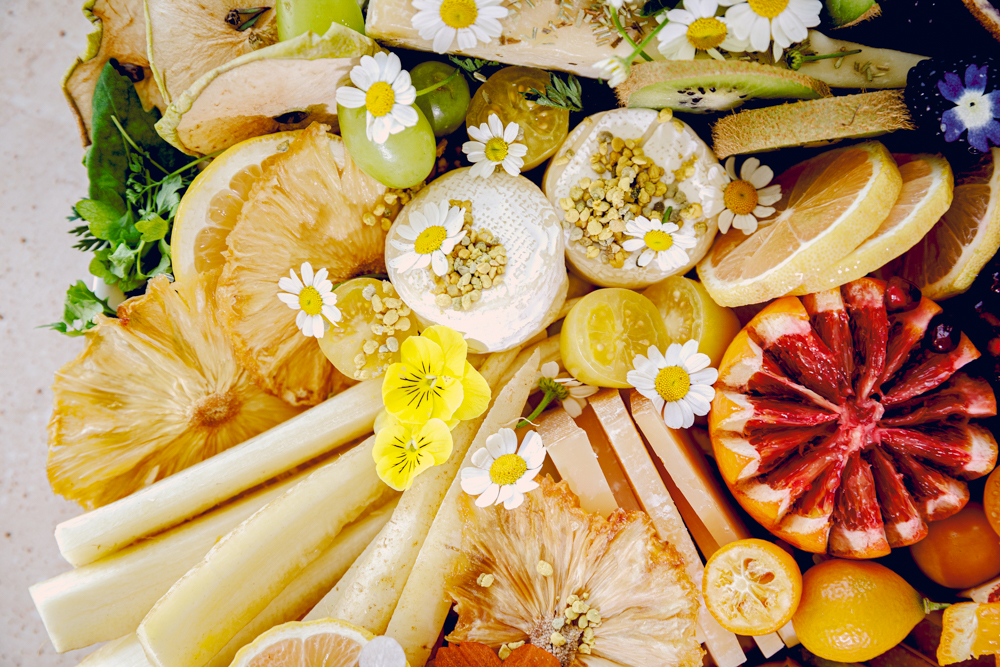
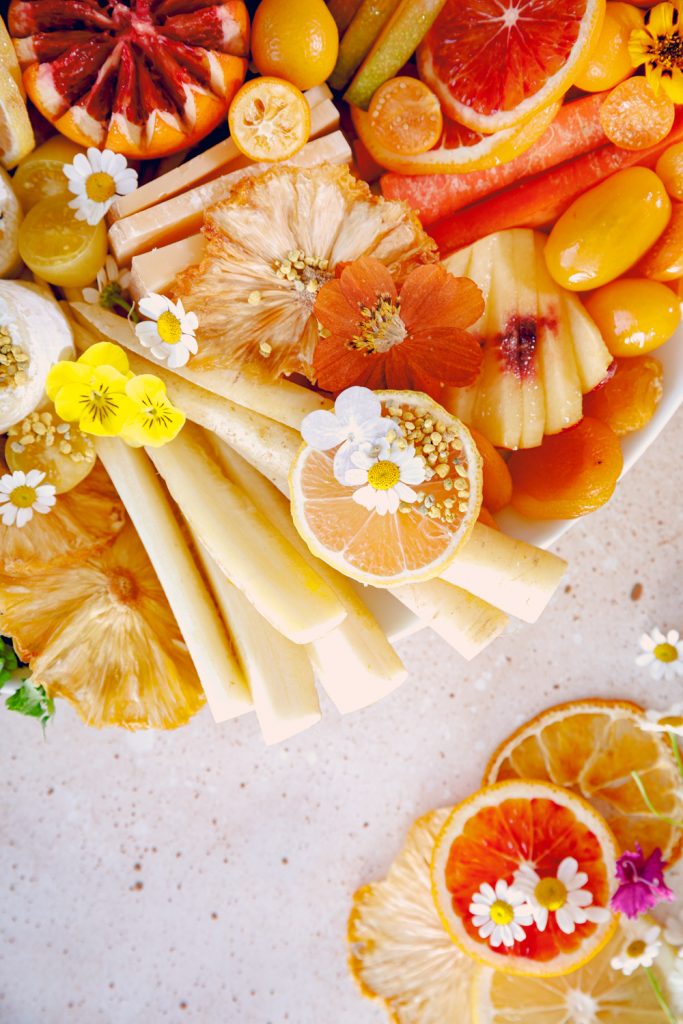
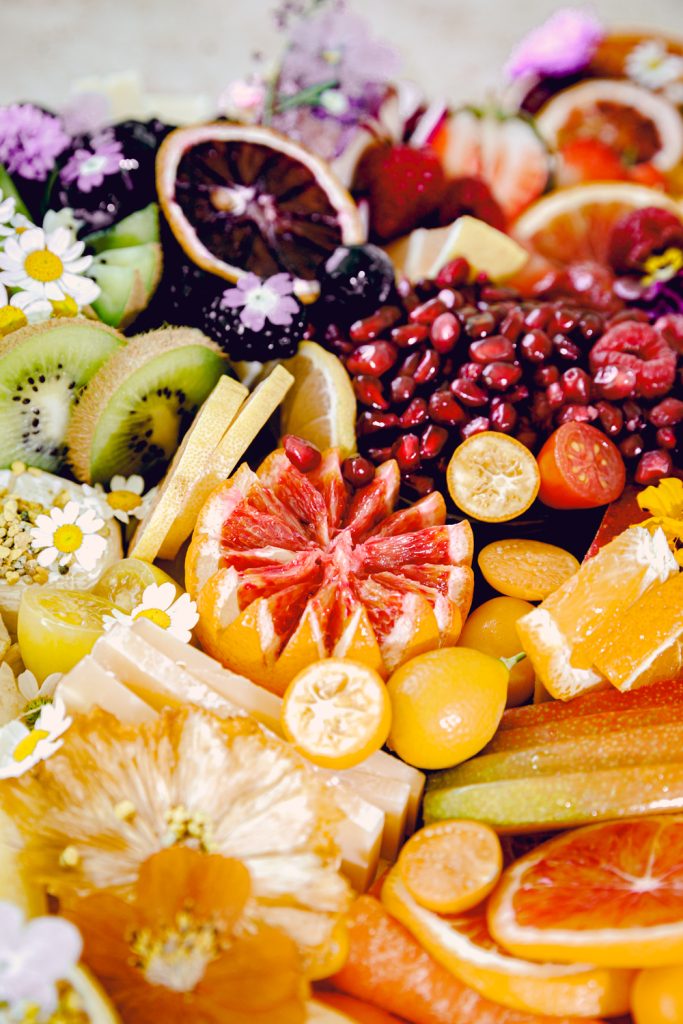
Keep in mind when you hit the grocery store or order anything online, play with what is available in the current season. Right now, we are approaching spring and leaving winter. With this time frame, you can still get some winter goodies, and probably will see some spring yummies. I will grab about 2-3 items for each color. I try to get different items that vary in texture and taste. For the cheeses, I will try and see if I can get any colored ones to throw into the mix.
Harry and David have a TON of items available right now. From citrus to veggies, you can get it all there! I also got edible flowers, dried fruits, and cheese from them! They are truly a one-stop shop!
STEP THREE: LET’S CLEAN AND ARRANGE!
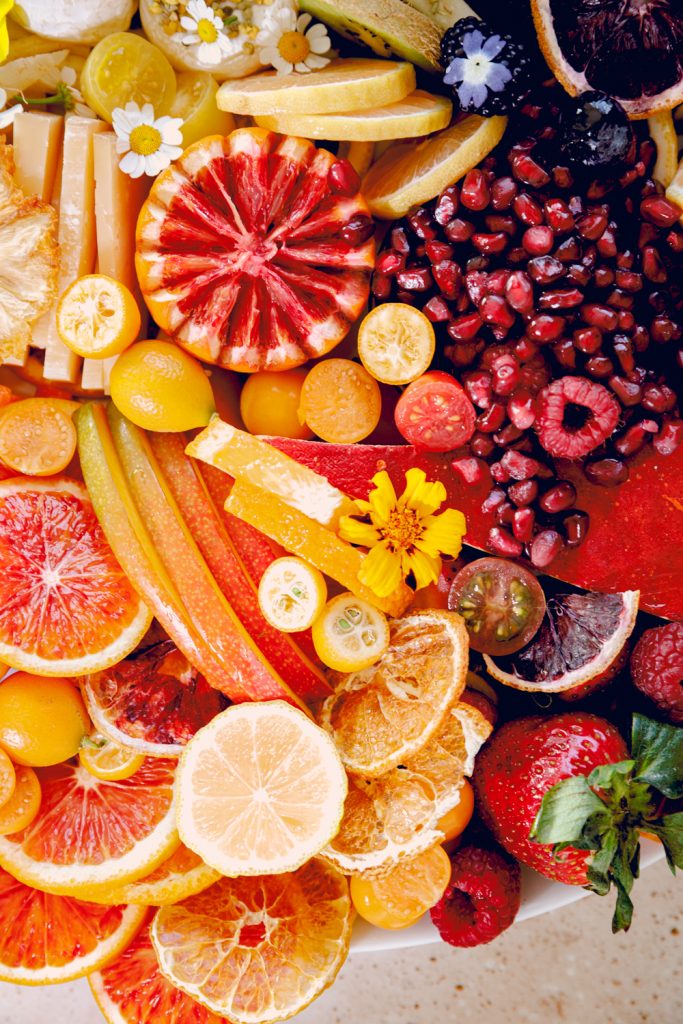
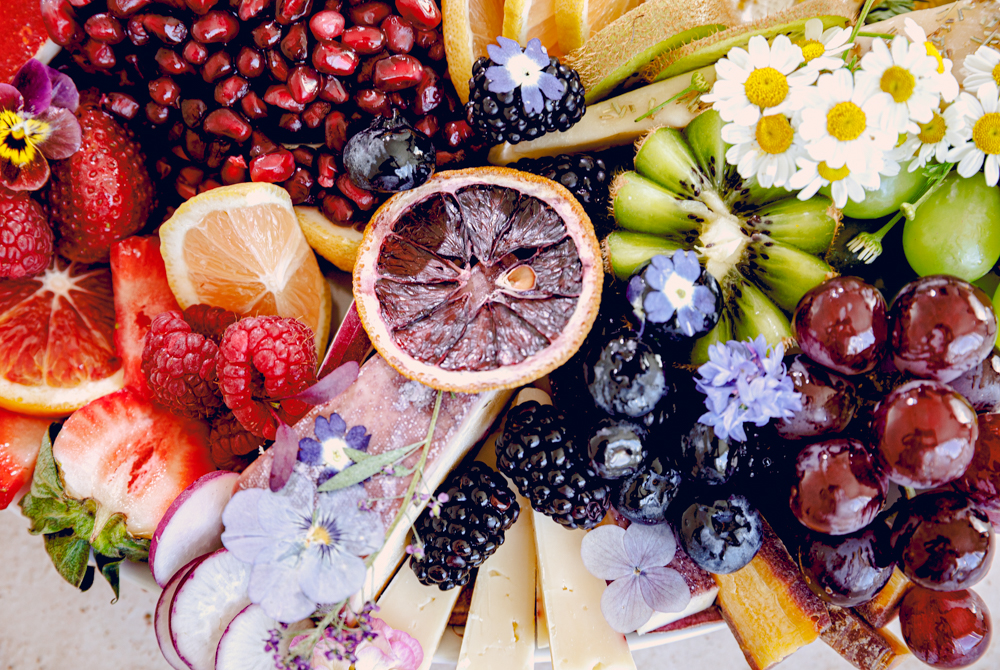
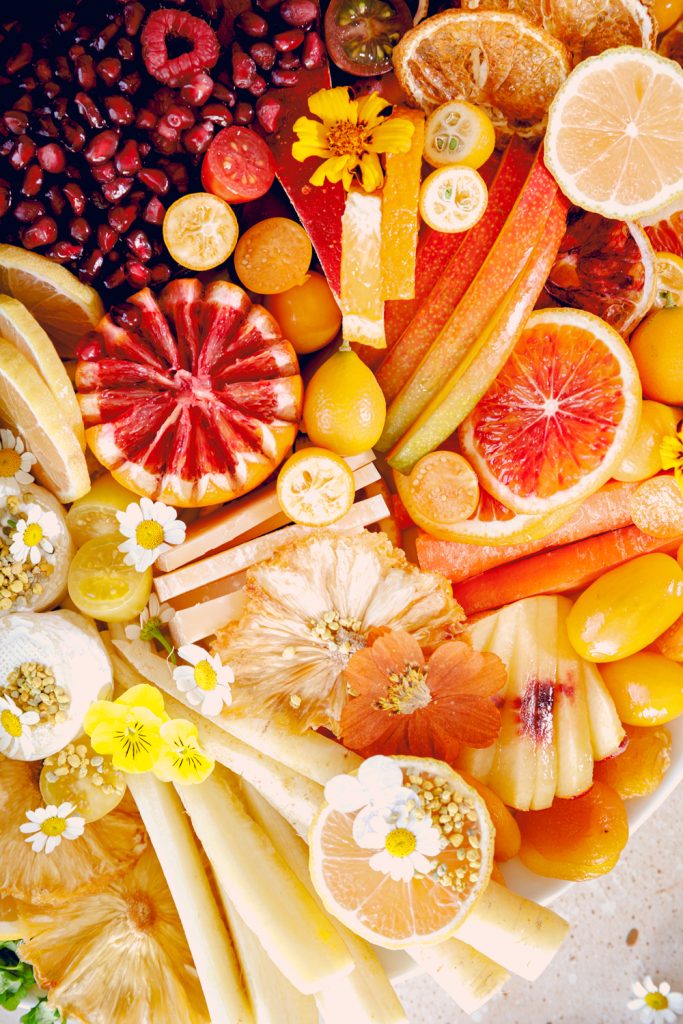
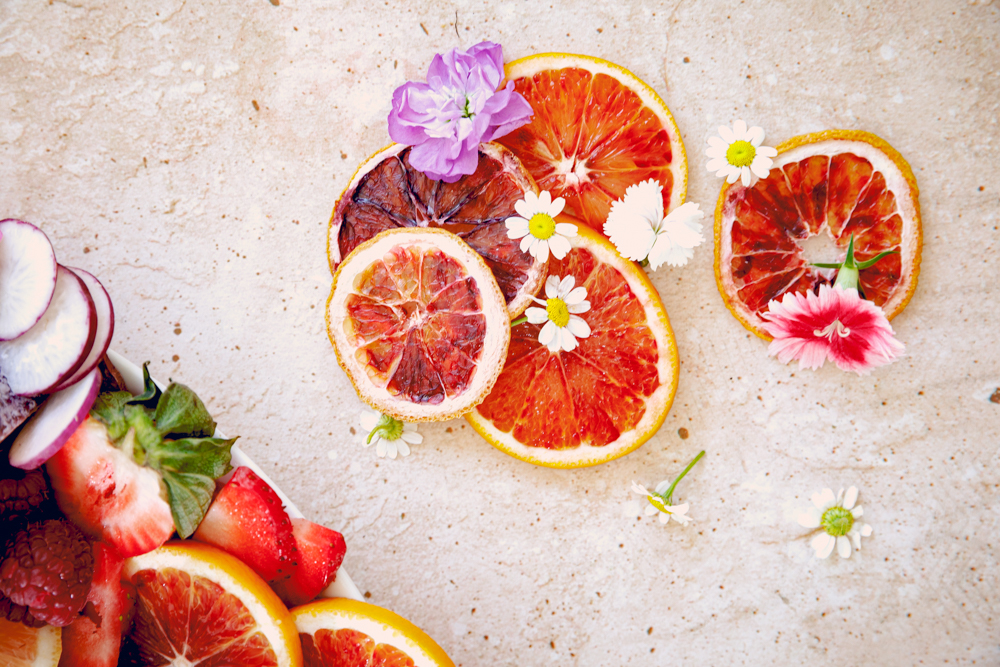
Please, please, please wash all your produce! Pat it dry, and then you are ready to assemble. No one wants a dirty raspberry! Now, the question is should I cut everything? Do I slice everything? This is where the answer isn’t black and white. You do you! I like to mix it up to create textures and shapes. For example, citrus and strawberries. I left some whole, some sliced in half, and some quartered. It really is up to you. But creating different shapes will create a more eye-appealing board.
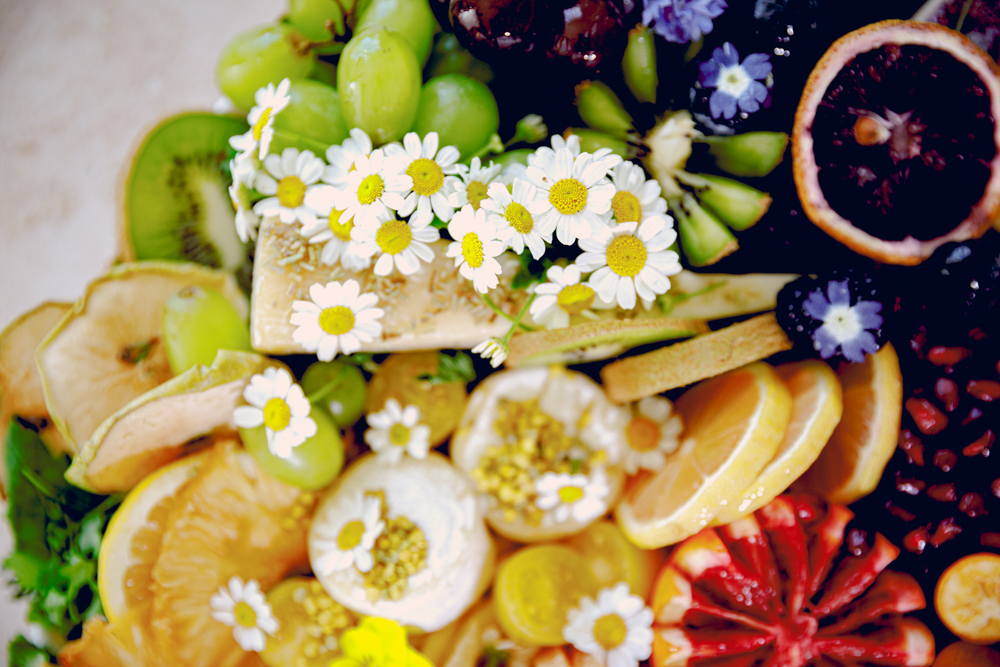
I start by spreading everything out on my counter by each color. I start with red and arrange the cheese first if I have one for that particular color. Then I simply just build around the cheese. I like to layer each color, meaning lay some citrus down on the bottom and then add some sliced strawberries on top followed by a couple of raspberries mixed in. It’s all about the textures and layers to achieve that pretty complex look.
STEP FOUR: FINISHING TOUCHES
Lastly, my favorite part! Adding the final touches. This is where I like to add some fresh flowers like chamomile, edible flowers, and even some dried ones. Plus, these are great if there are any areas you want to hide. Say there is a tiny gap between a cheese and a piece of fruit. Add a flower to cover that up. I also like to add some bee pollen too! Again, it’s all about the textures, colors, and layers.
There you have it! One pretty rainbow board that will wow any of your guests. I do have to admit I love to do these, it is a very calming and therapeutic activity to do.

B E I J O S K I T C H E N
xx
Abby
[…] BEIJOS EVENTS . COM […]