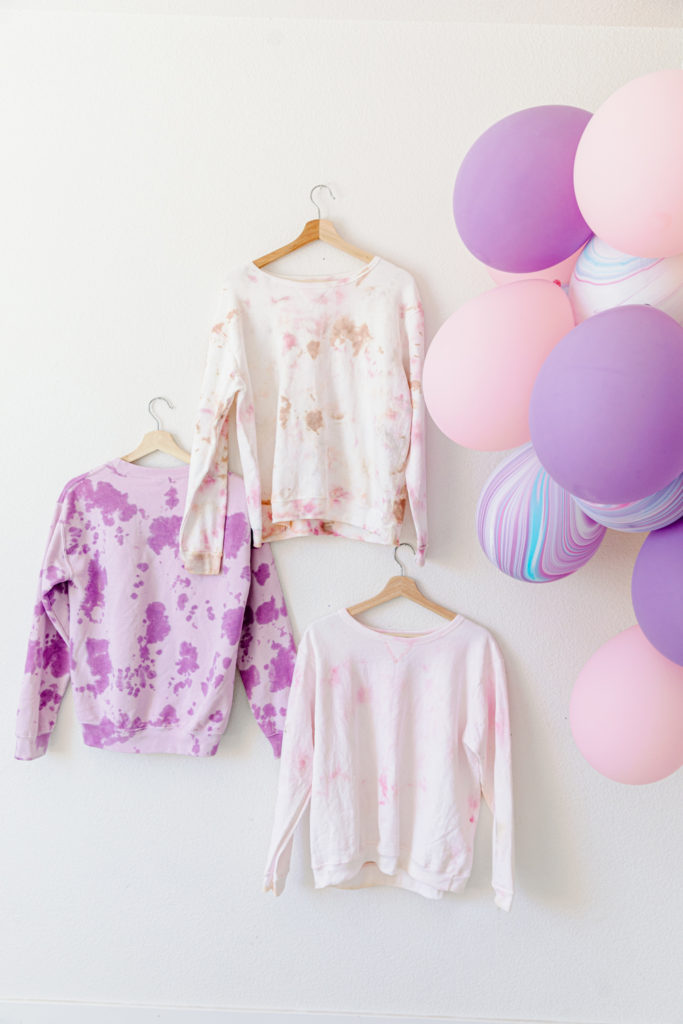
We are on the tie-dyed craze right now, and we are totally obsessed with it! Making your own at home is so easy to do, and such a fun activity to do with the kids for the summer! We teamed up with our friends over at Rit Dye to show you how to make your wardrobe extra cool. There are so many different methods to tie-dye, the designs and colors are endless. Once you start, I bet you won’t stop. You will find yourself thinking about what else can I tie-dye in the house?? I’m showing you my two favorite ways to take a plain sweatshirt and jazz it up. Let’s get our tie-dye on!
Photos by Danya Studios

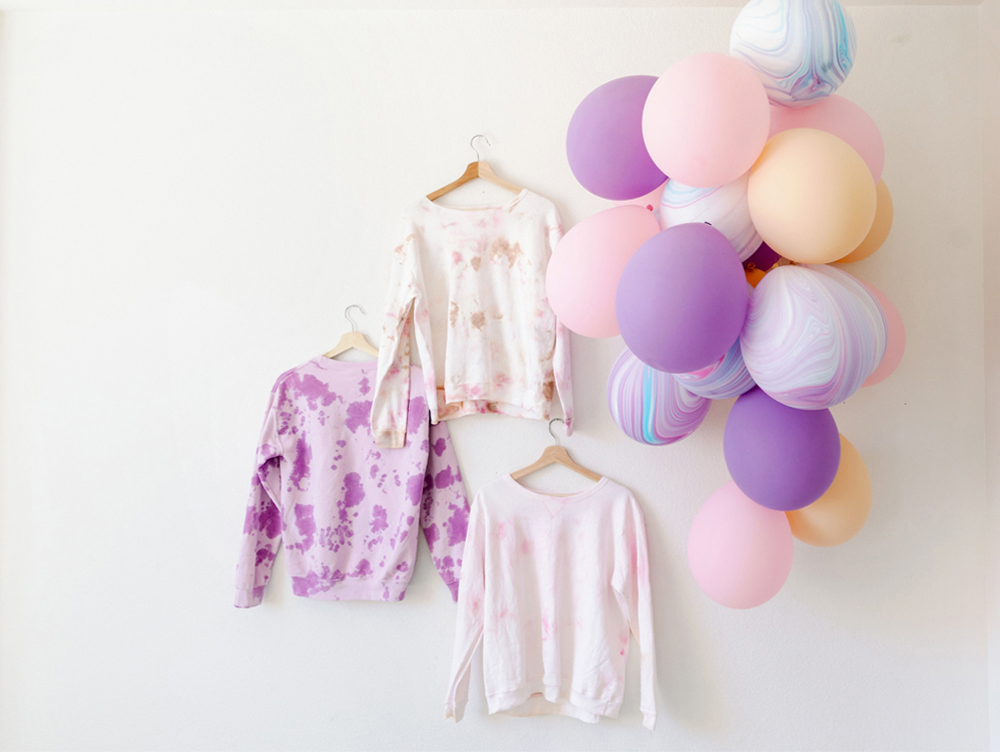
Tie-Dye Sweatshirts
S U P P L I E S
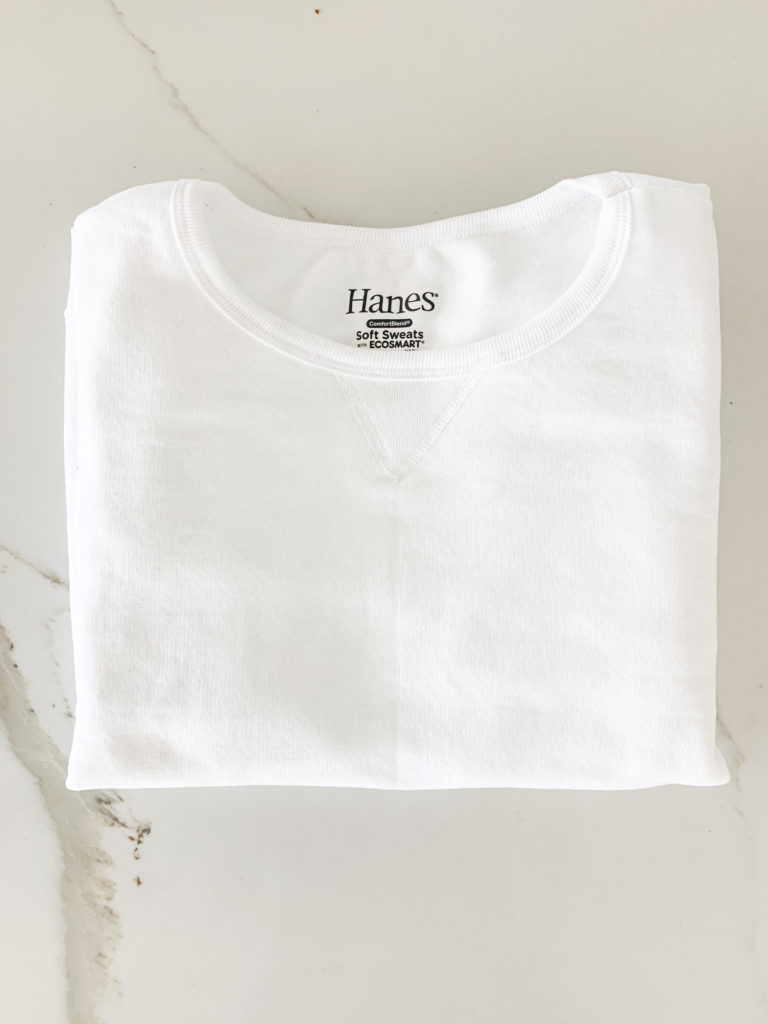
Sweatshirt
Rit All-Purpose Dyes
Container/Bucket
Squirt Bottles
Bleach
Rubberbands
Rubber Gloves
Drying Rack
I N S T R U C T I O N S
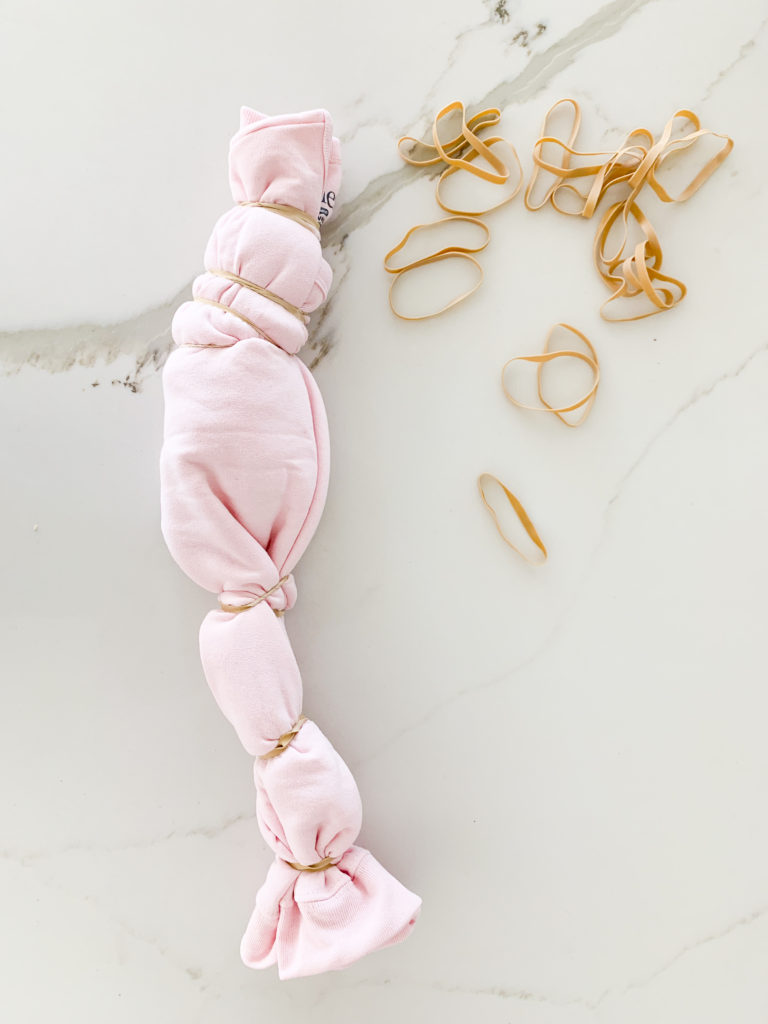
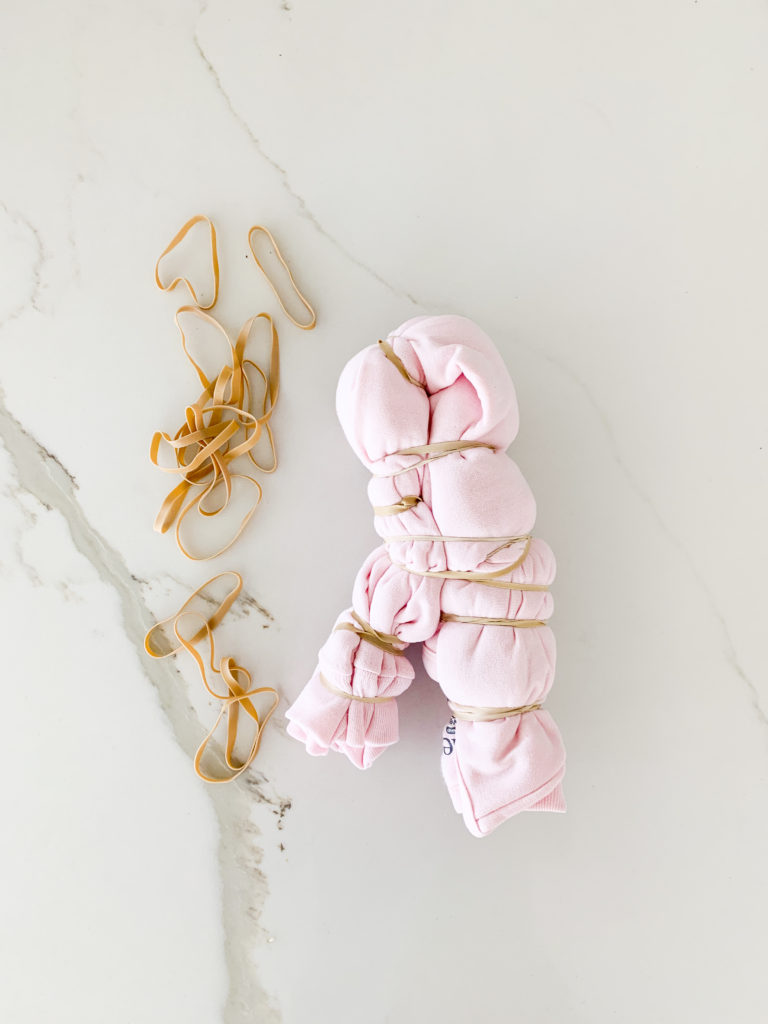
Scrunch Tie-Dye Method
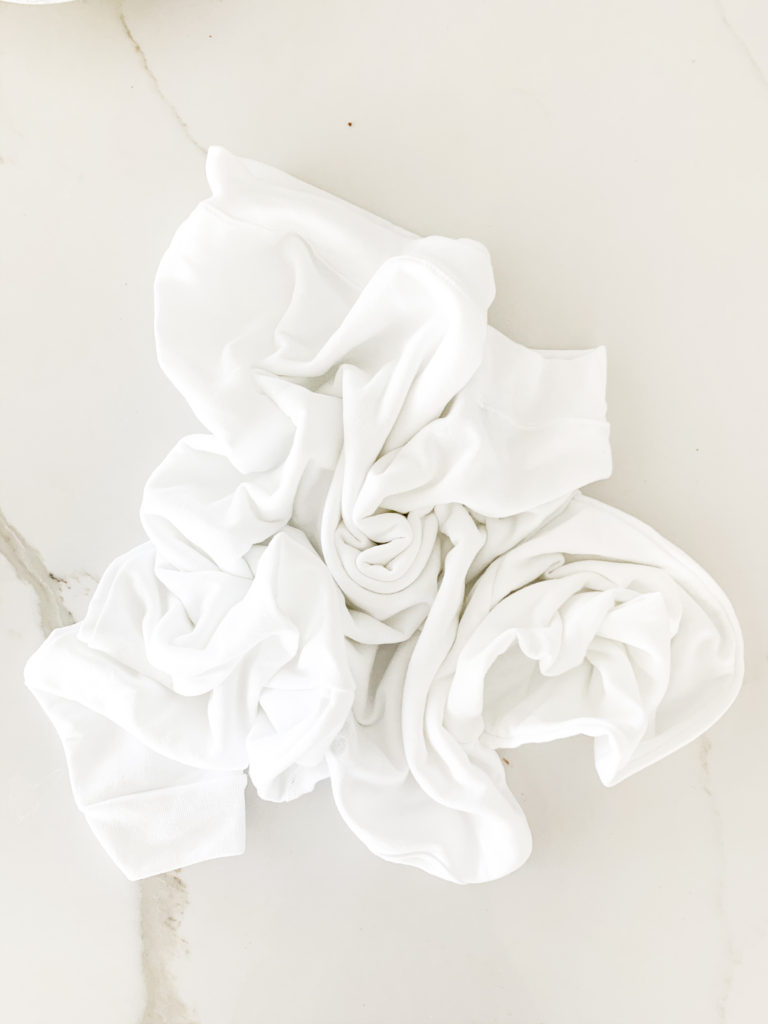
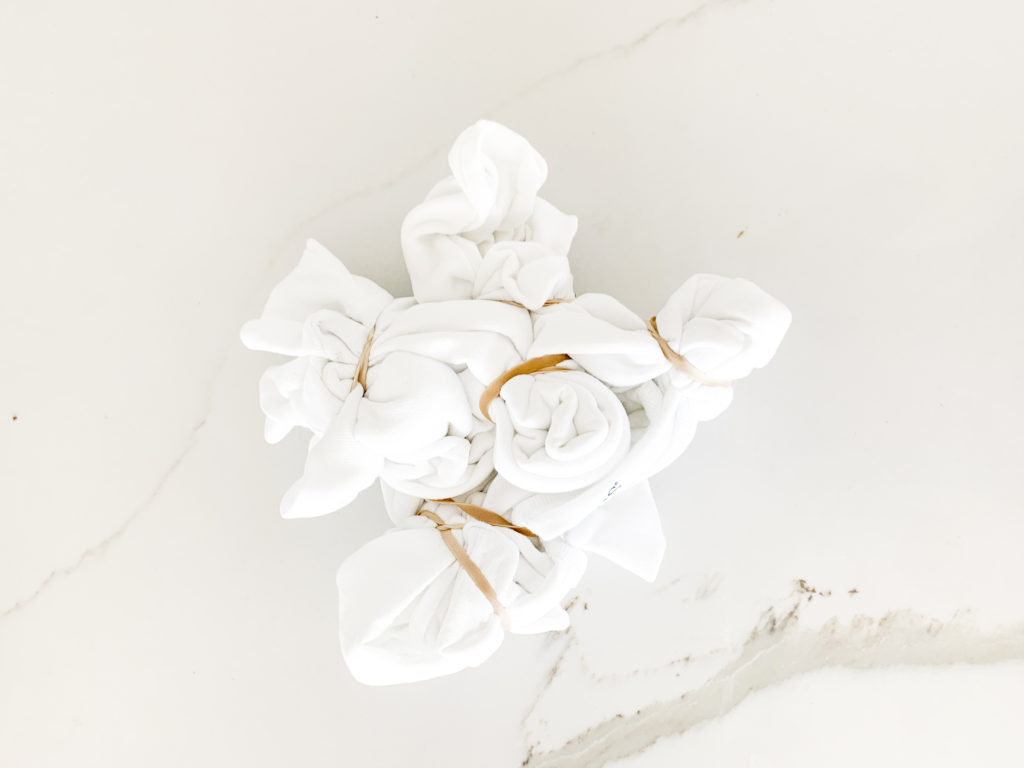
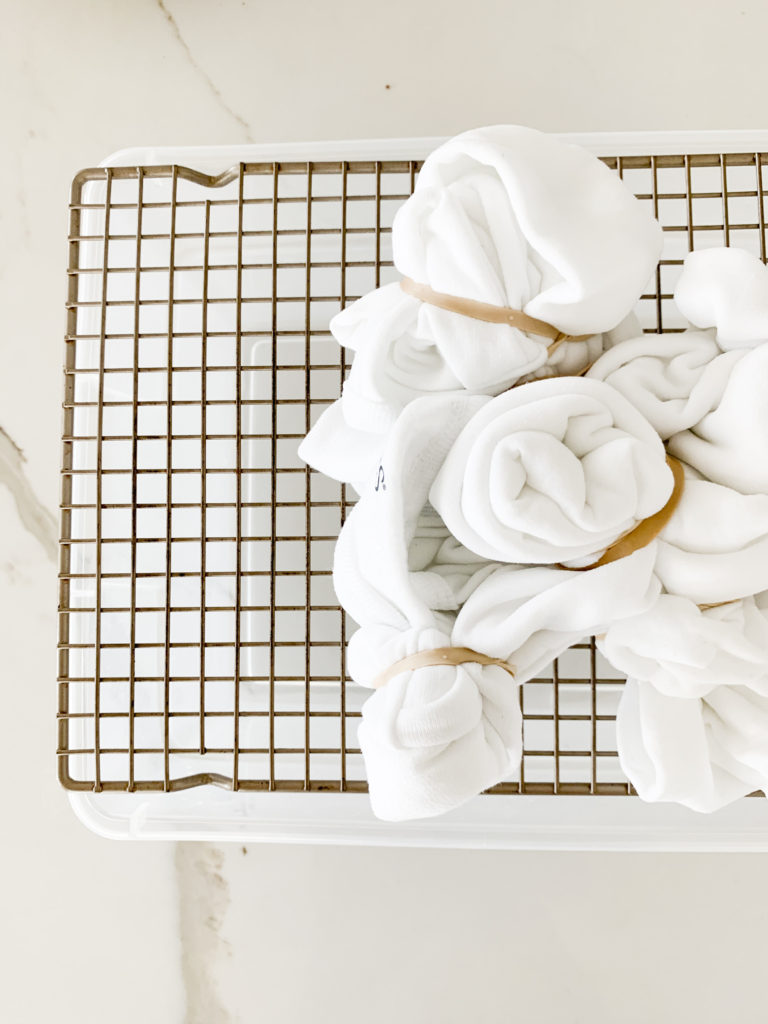
Scrunch a section of the fabric and secure with rubber bands. The more tightly you secure the scrunch, the more white space you will see in the final result. Repeat scrunching various sections of the fabric. With each section, vary the amount of fabric scrunched. Continue until the majority of the fabric is scrunched. Now shape the fabric into a ball with more rubber bands.
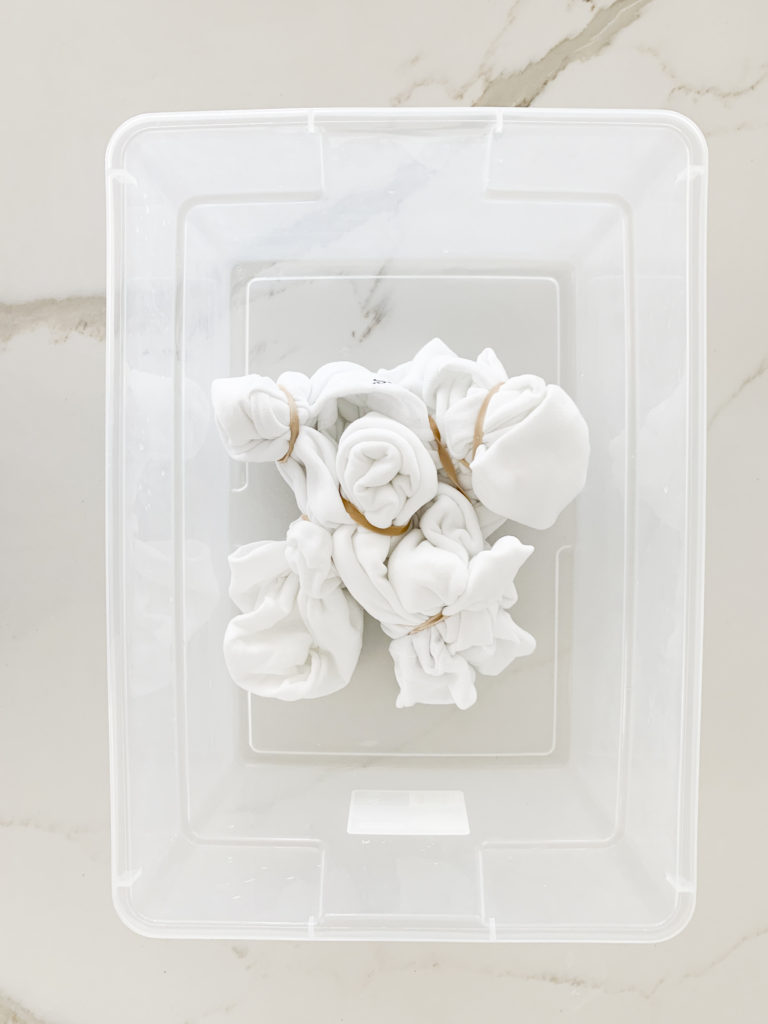
Take your sweatshirt and dip in water; squeeze out excess water. Set aside.
Wearing rubber gloves, mix two tablespoons of well-shaken liquid dye with two cups of hot tap water. Add one tablespoon of salt. Pour into a squirt bottle. Shake well. Repeat for each color.
Rit Dye has an excellent formula booklet online to reference for every color under the sun. I went with pinks, greyish blues, tans, and some purple. Check them out here before ordering!
Place fabric on a baking rack with a tray under it. This is very important because it keeps the dye from puddling under the fabric. Squirt each dye color on fabric as desired.
*If you are trying to achieve sections of white space, purposely leave certain sections of the fabric white and undyed.
*If using multiple colors, plan to put adjacent primary colors (red, yellow, blue) or secondary colors (orange, green, purple) next to each other. In the areas where they run together, they will blend together and create a third color. Keep paper towels handy to remove any dye that seeps into an area where you plan to place another color.
You can also do the ice method as well, which fun to do! You need to use powdered dye and not liquid. Place ice on top of the sweatshirt and sprinkle the dry dye on top. I tried both methods on this sweatshirt. It’s fun to do more than one way, there is no limit on creativity here.
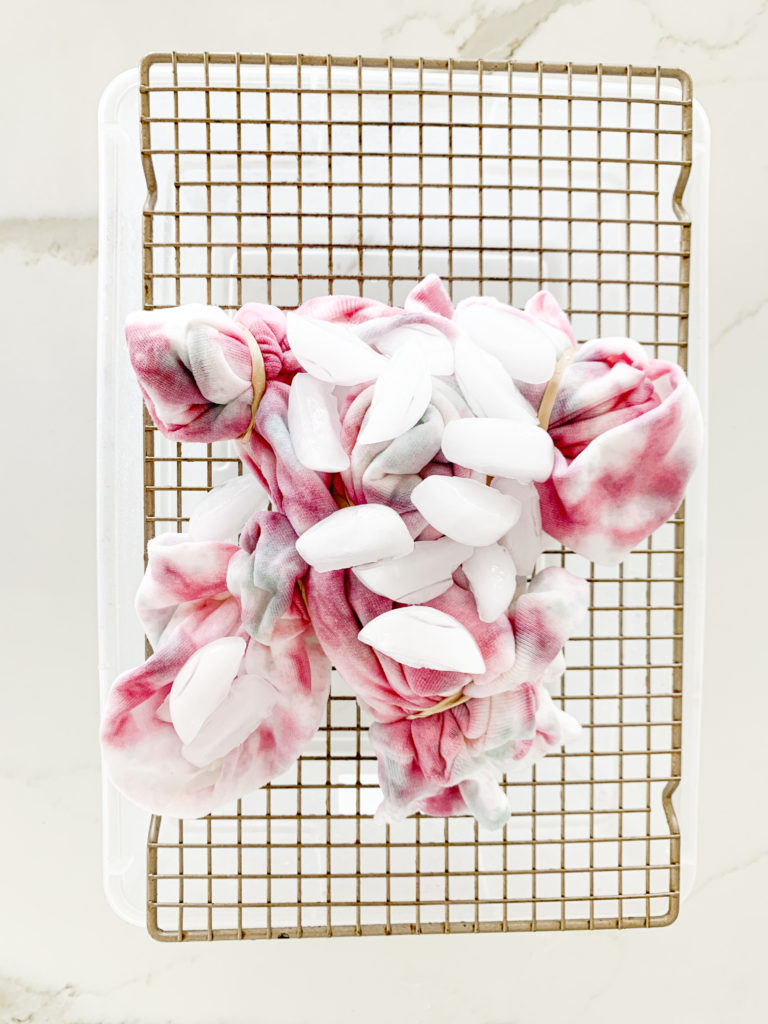
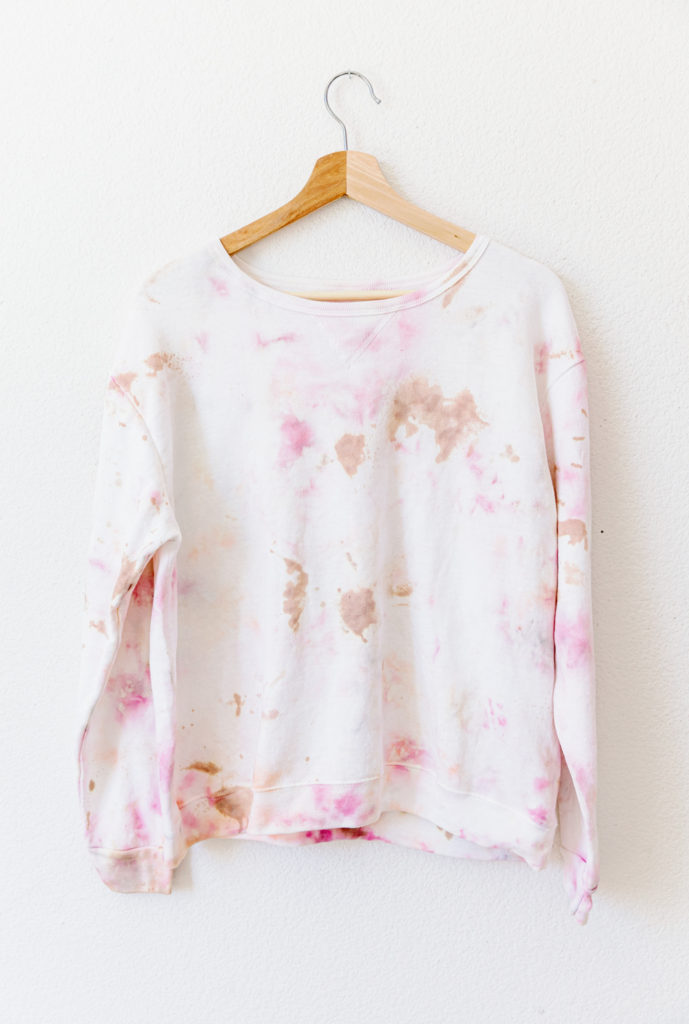
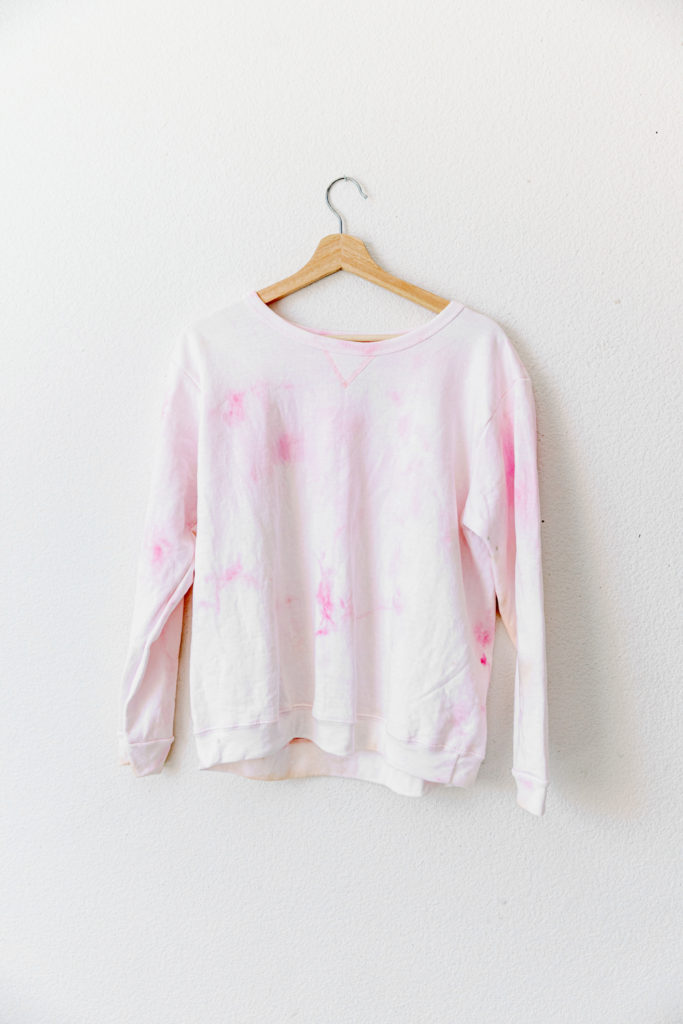
After the dye is applied, let the fabric sit for 30 minutes to allow the dye to absorb. I then rinsed it out, and noticed that I wanted more dye in sections. I scrunched it back up, and added more dye. Plus, since I was doing reverse bleach method as well, I sprayed some bleach on it too! It gave it some white bleach marks on top of the color, super fun.
To set the dye, do the following while the fabric is still tied up:
Apply Rit ColorStay Dye Fixative with a squeeze bottle, which will enhance the colors and reduce bleeding. Mix two tablespoons of well-shaken ColorStay Dye Fixative with water and apply liberally to both sides of the fabric.
Rinse in cool water until rinse water begins to run clear. This is very important to prevent unabsorbed dye from bleeding into any white areas. If possible, rinse with the fabric bundle sitting flat on the baking rack. If it is held vertically, some of the unabsorbed dye could run into white areas as it is rinsed off. Carefully remove rubber bands with scissors and unfold the fabric. Wash in cold water with a mild detergent, rinse and dry.
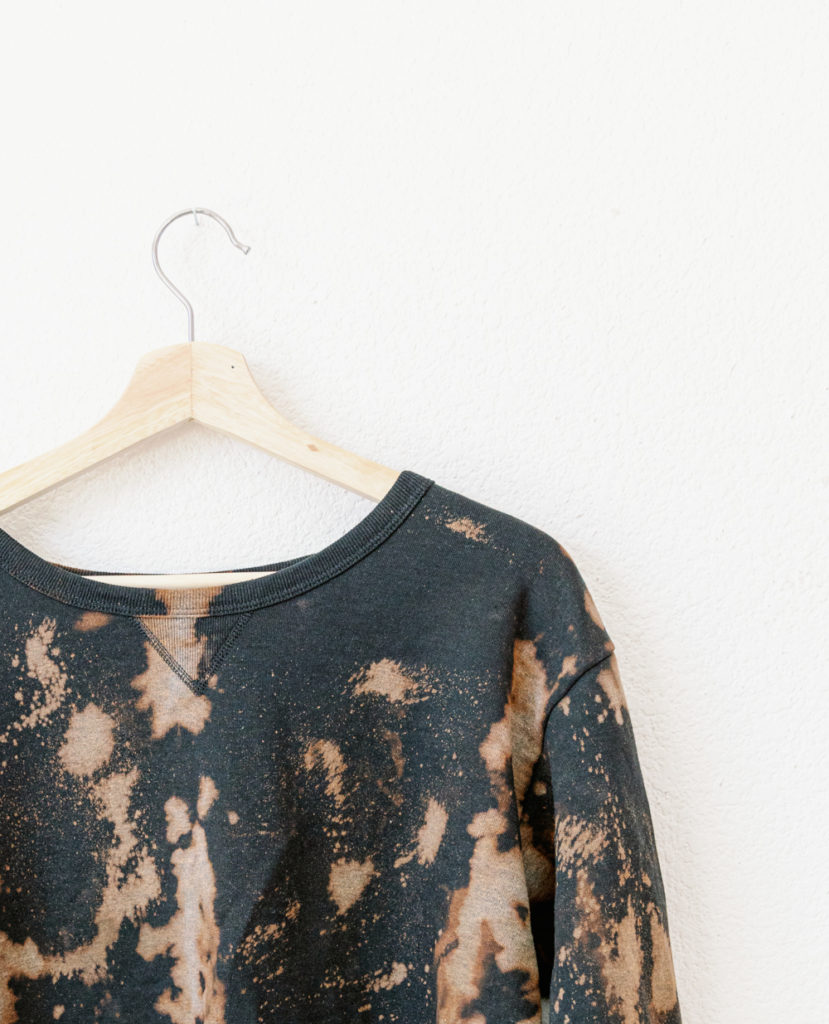
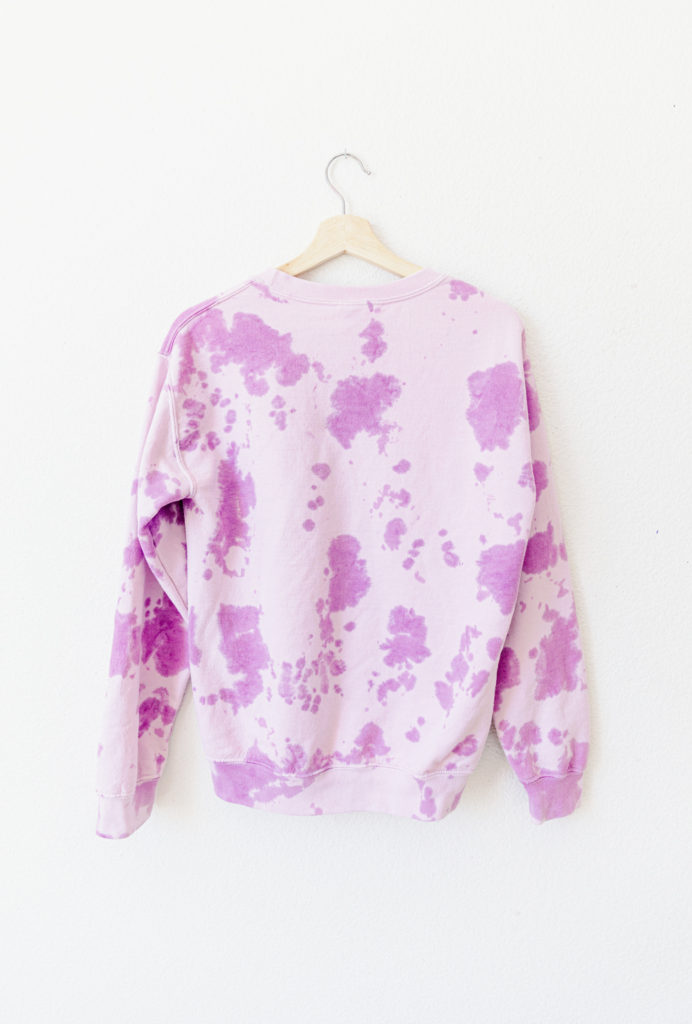
Reverse Bleach Method
I thought this method was super fun to do and watch! All you need is a colored sweatshirt and bleach! No dye needed here! You probably have all these supplies at home right now!
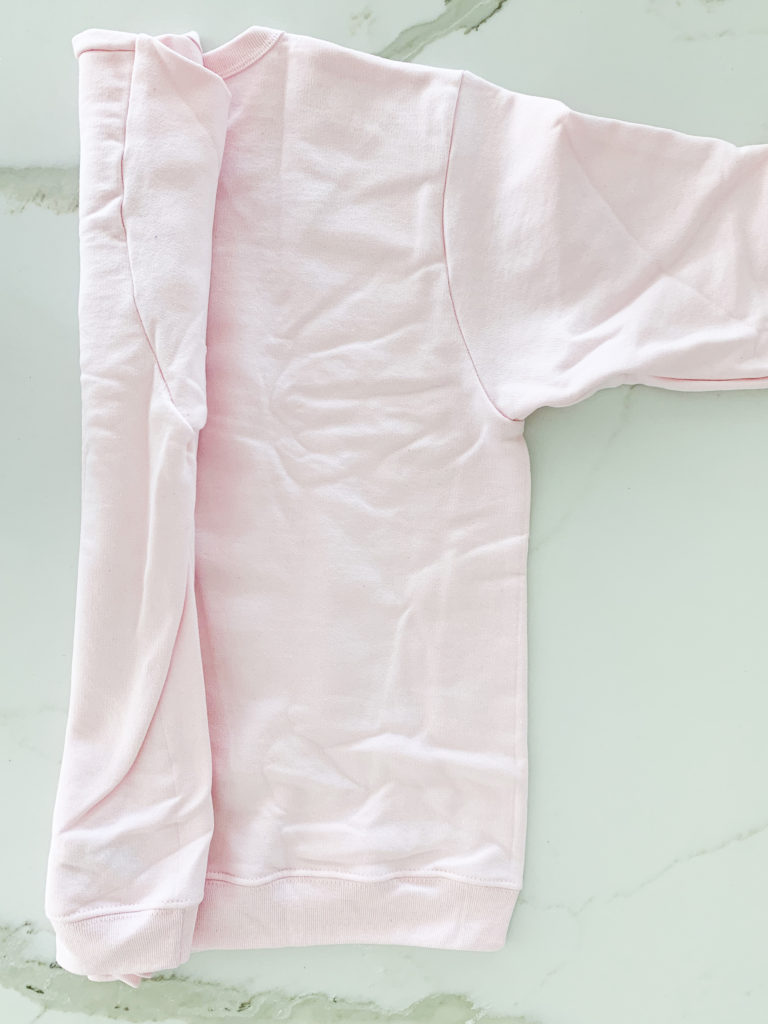
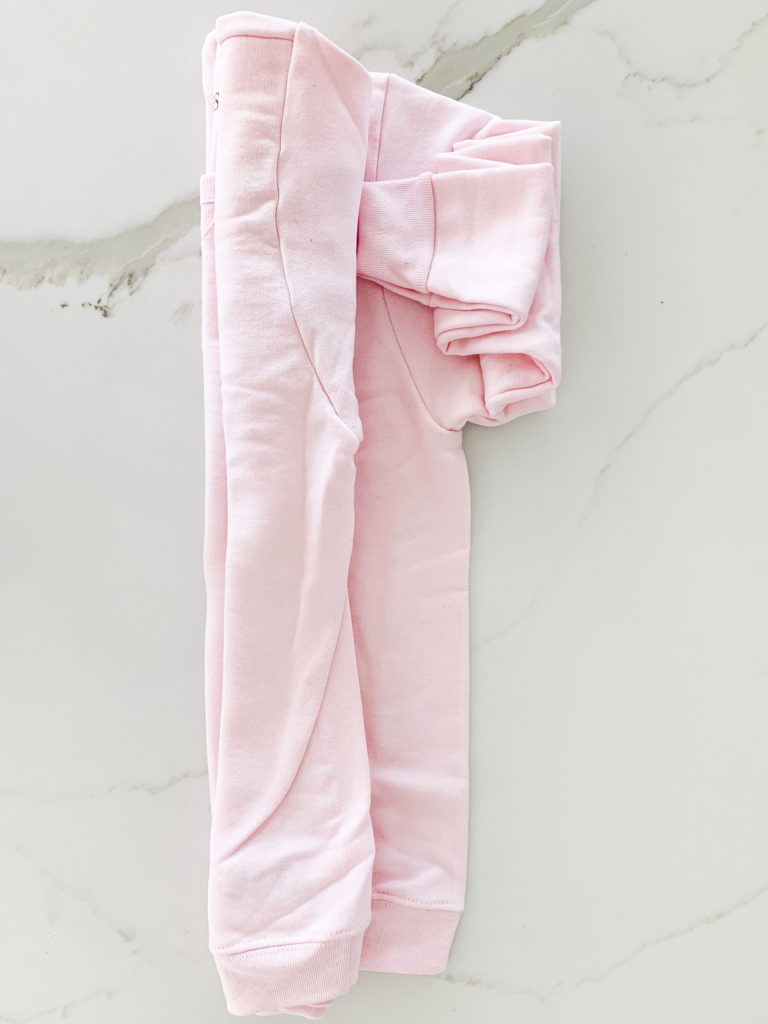
Simply, fold or scrunch your sweatshirt. I did the accordin method here. Fold shirt vertically or diagonally, like an accordion or fan, in 2” to 3” wide folds. Then wrap with rubber bands every 2” to 3” or as desired. I then folded together and added more rubber bands.
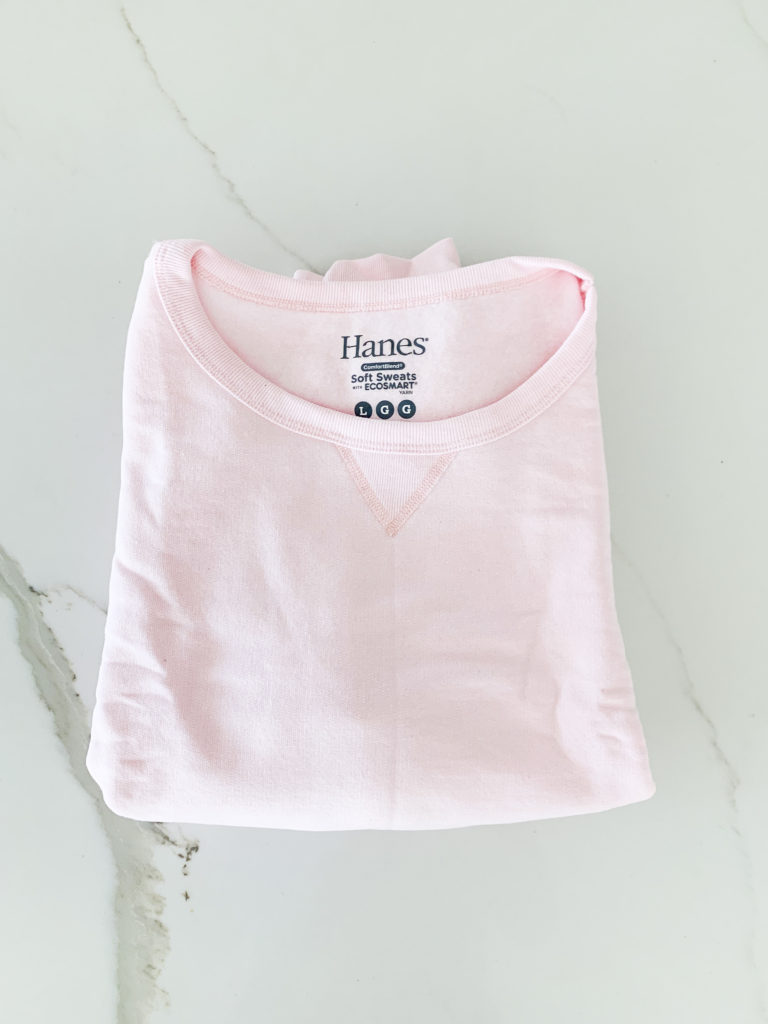

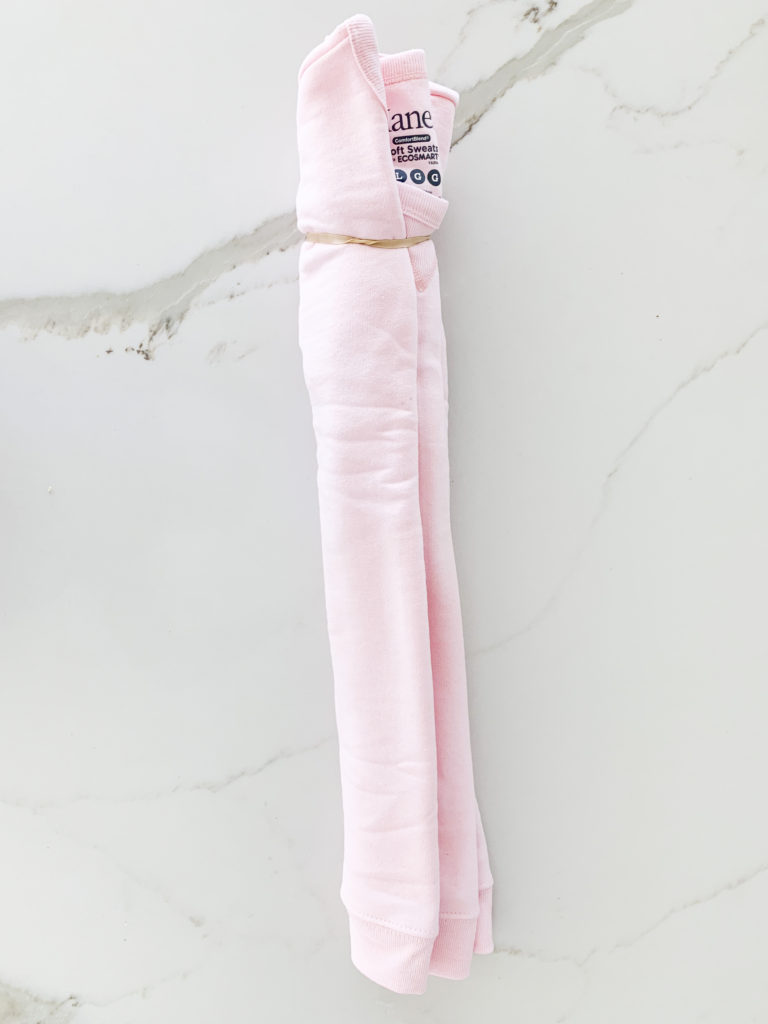
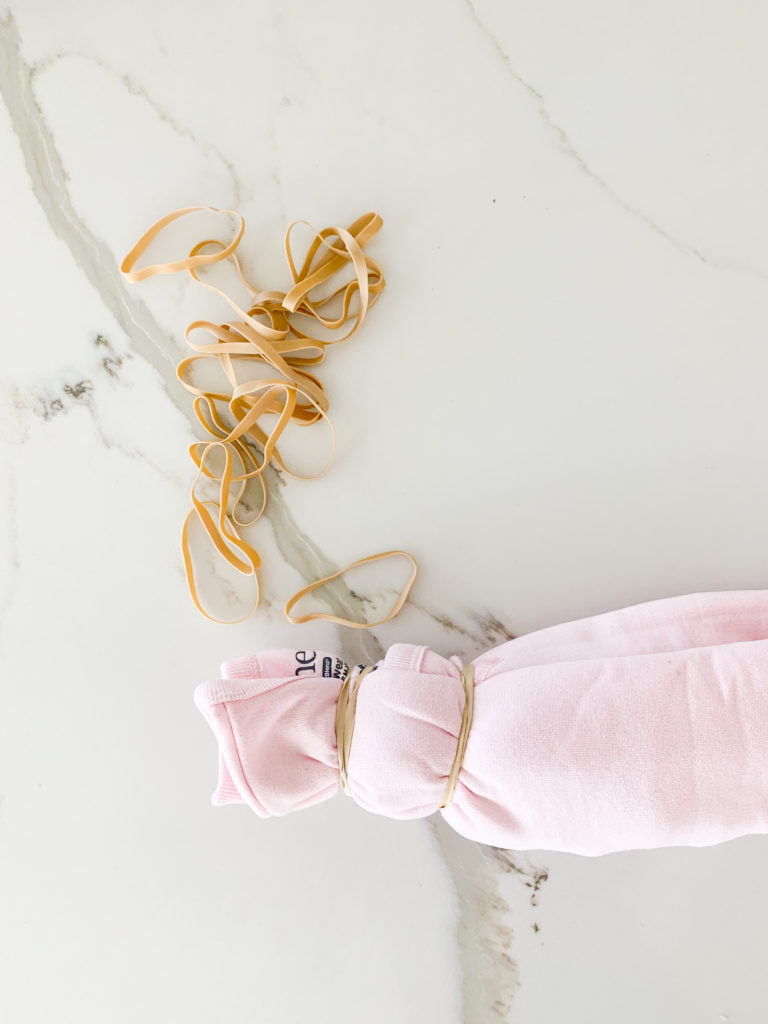
Once your sweatshirt is all bundled up, rinse with water and place in your container. Take your bleach bottle and spray away. You will see an instant color change. Now, I used a light pink sweatshirt, and it got very very light in color. I let it dry, and then used a pink dye and squirted some areas to add a darker pink since it got so light. I let it dry outside for about 30 minutes or so. Rinsed and washed in cold water.
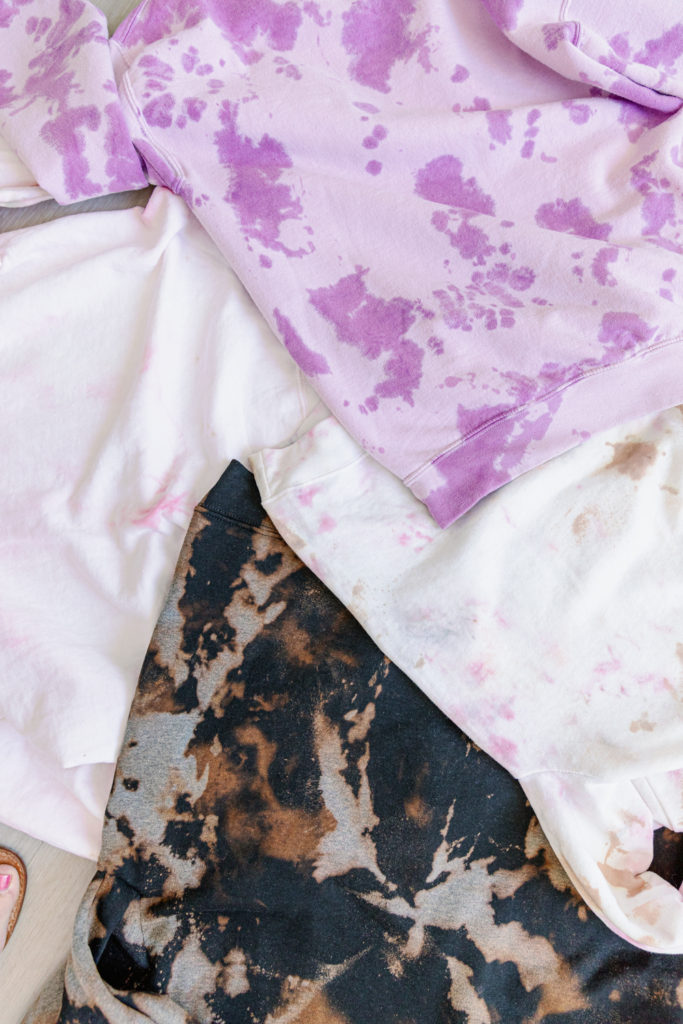
I also did a black sweatshirt! I did the scrunch method and then sprayed with bleach. I let it dry 30 minutes in-between each round. I did three rounds of bleach for the black sweatshirt. I would take the rubber bands off and re-scrunch and spray again. Dry and repeat. Then wash in cold water!
So fun right!! Now hurry up and go tie-dye it up!! Shop all the goodies below to get started!
Happy Tie-Dying!
B E I J O S C R A F T C L O S E T

xx
Abby