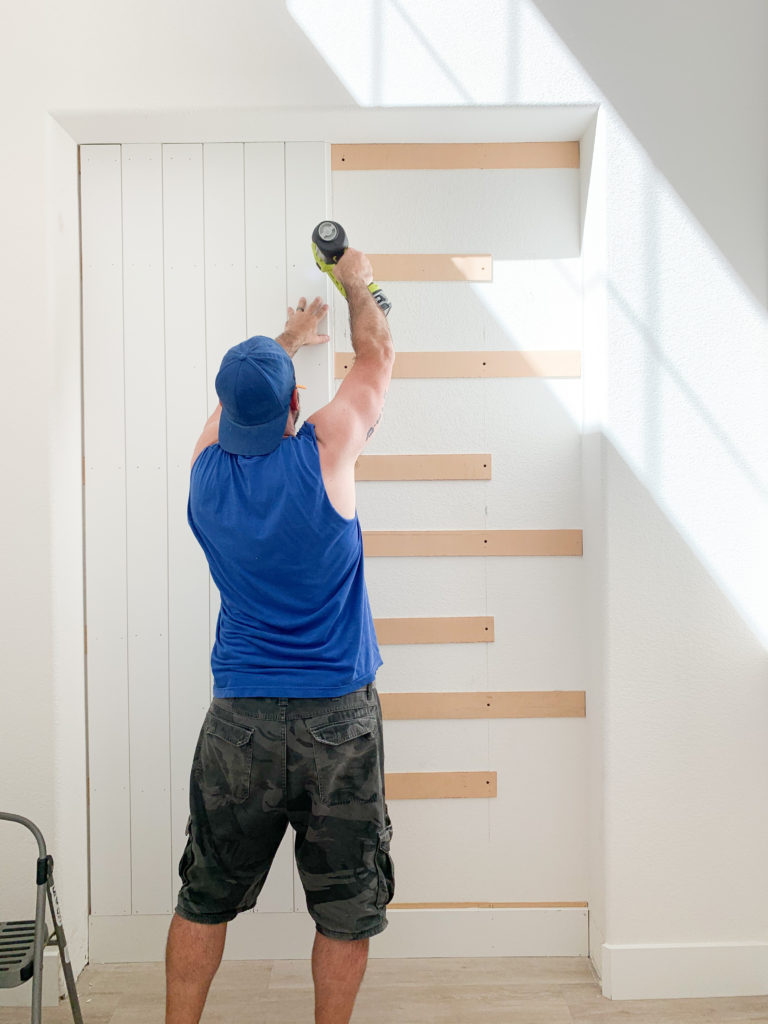
Projects are happening again over at the Guido house, and I’m so excited! I have a laundry list of projects that I have for my husband just like I’m sure all of you have. I have the designs down, the exact way I want them all styled. The only issue? Pulling him off the golf course on the weekends to do all those projects! Who else is with me, ladies!?! But, but in all seriousness, he is so handy and is such a trooper to put up with all my demands, and most of those are last-minute changes. He loves that ALOT! Ha! So when I see those “project” shorts on, I get so excited! He has a project uniform, haha! You will see in the photos later. Our entryway was pretty boring, and I wanted to bring some of the vertical shiplap we have in other parts of our home into there. If you are looking for something just like this, you are in luck! Today, he is sharing with you step by step, and I’m showing you how I styled it up!
Photos by Dayna Studios
The Before
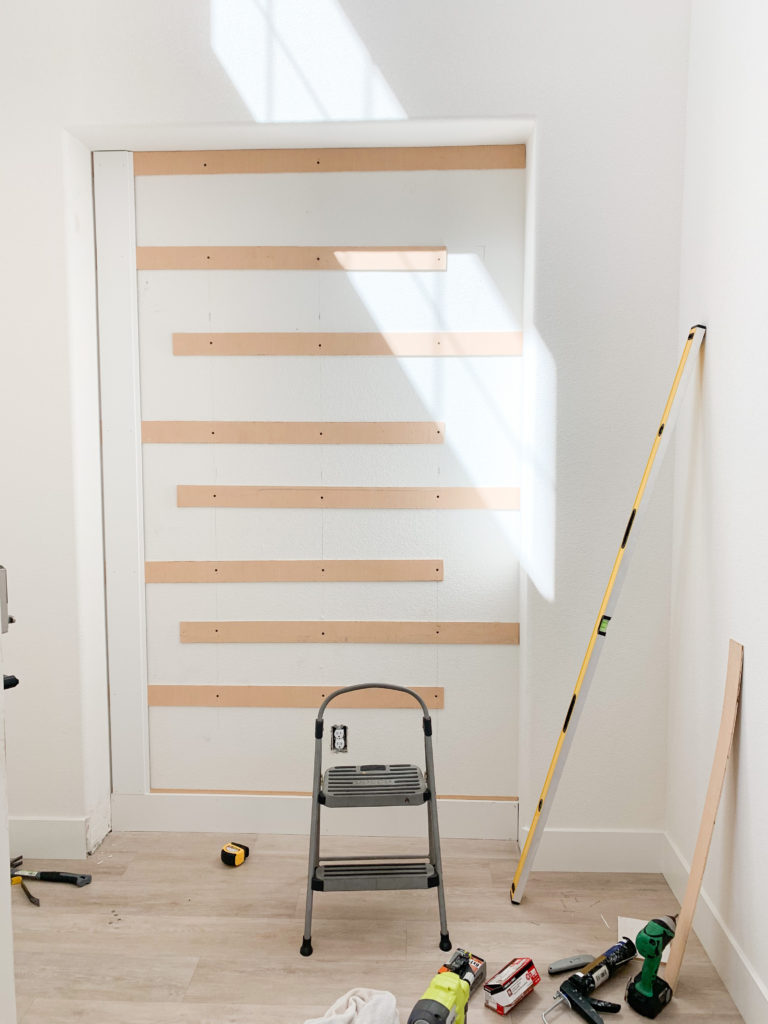
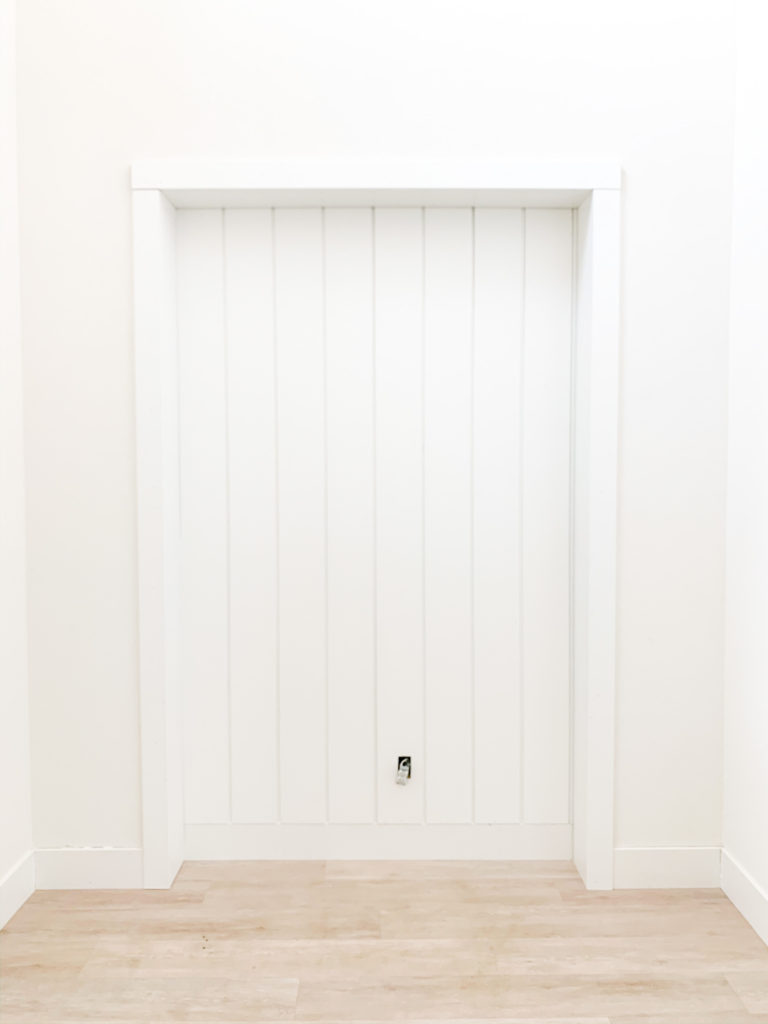
So before our little project, you could see it was a sad little space that was desperately needing some love. It was hard to figure out what to do with that area. Its right by the front door, so doing a built-in cabinet there didn’t seem practical. One day, I saw the frame makers picture light online at Studio McGee, and knew that it was meant to be in that area! So the vision began from there. A little shiplap, framing out the wall and adding in some pretty artwork and pillows, and we have ourselves a fun entryway.
Get Your Tool Belt On
Supplies
1X8 pre-primed MDF shiplap boards
1X10 pre-primed pine for entry casing
1X4 pre-primed pine for door trim
18 gauge brad nailer
Level
Miter saw
Table saw
Liquid nailes
Drill
1/4 plywood ripped into 3 inch wide strips
220 fine grit sand paper
Spackle
White Chaulk
The How To
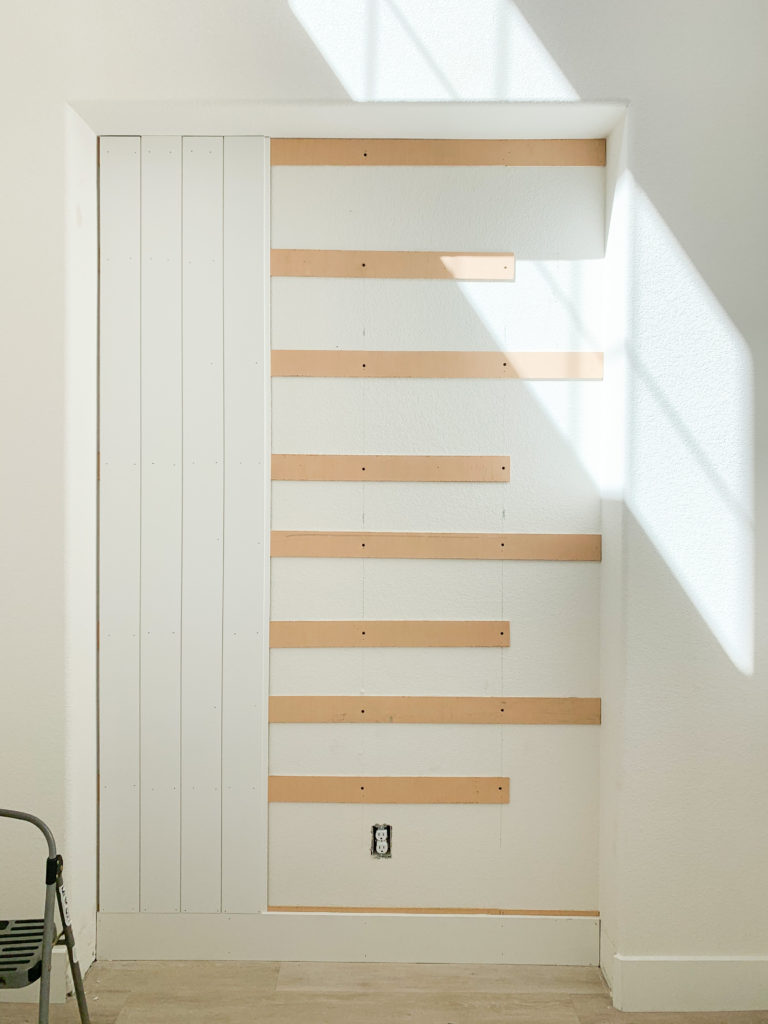
Step 1: Rip the 1/4 inch plywood into 3 inch wide strips. Adhere to the wall with screws into the studs. The reason for this step was to provide backing for the nails since it was vertical shiplap.
Step 2: Cut and install the shiplap boards. Cut the shiplap board to size with miter saw and install using an 18 gauge brad nailer, making sure to drive the nails into the 1/4 inch backing that was installed in step one.
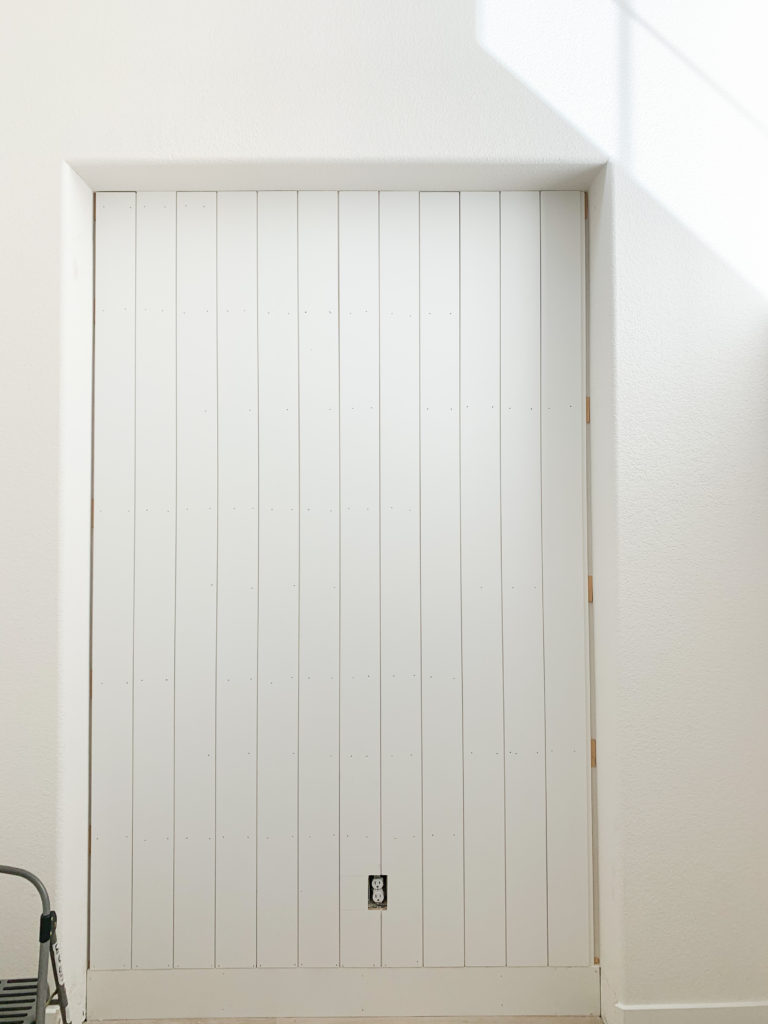
Step 3: Measure the interior top casing and cut to size the 1×10 pre-primed pine, and install with a brad nailer. Next, do the same for the side casings.
Step 4: Measure the sides for the nook trim, and install using a brad nailer.
Step 5: Fill all the holes with sparkle. Then sand with fine-grit and caulk the holes. Let dry, and then you’re ready to paint!
BEIJOS TOOL SHED

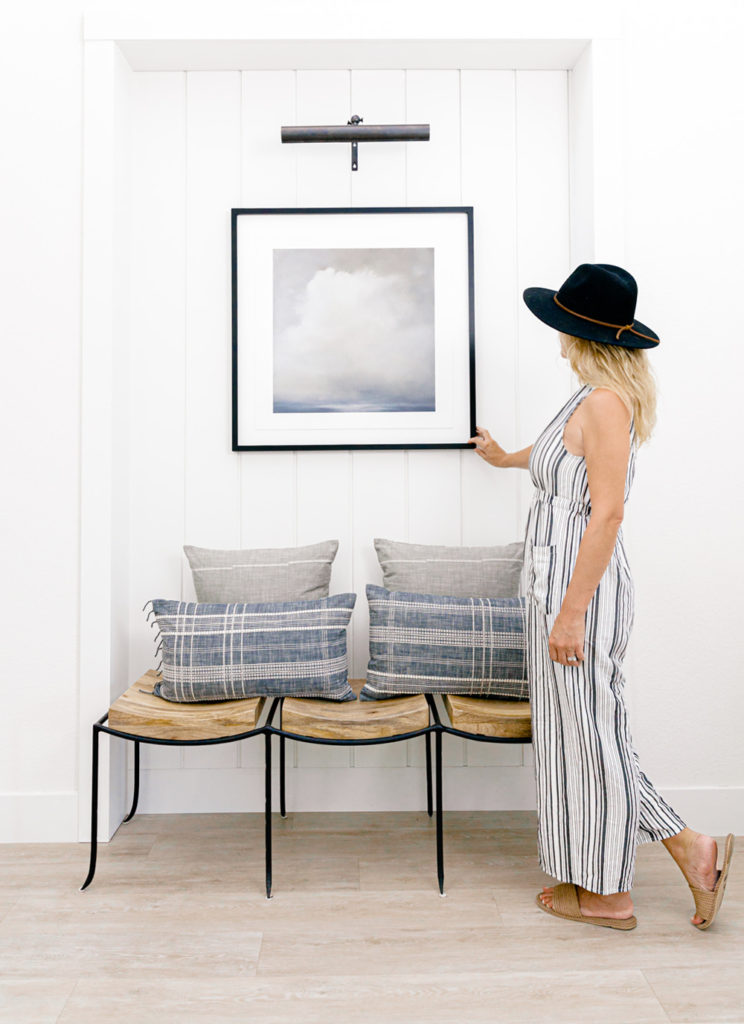
The After
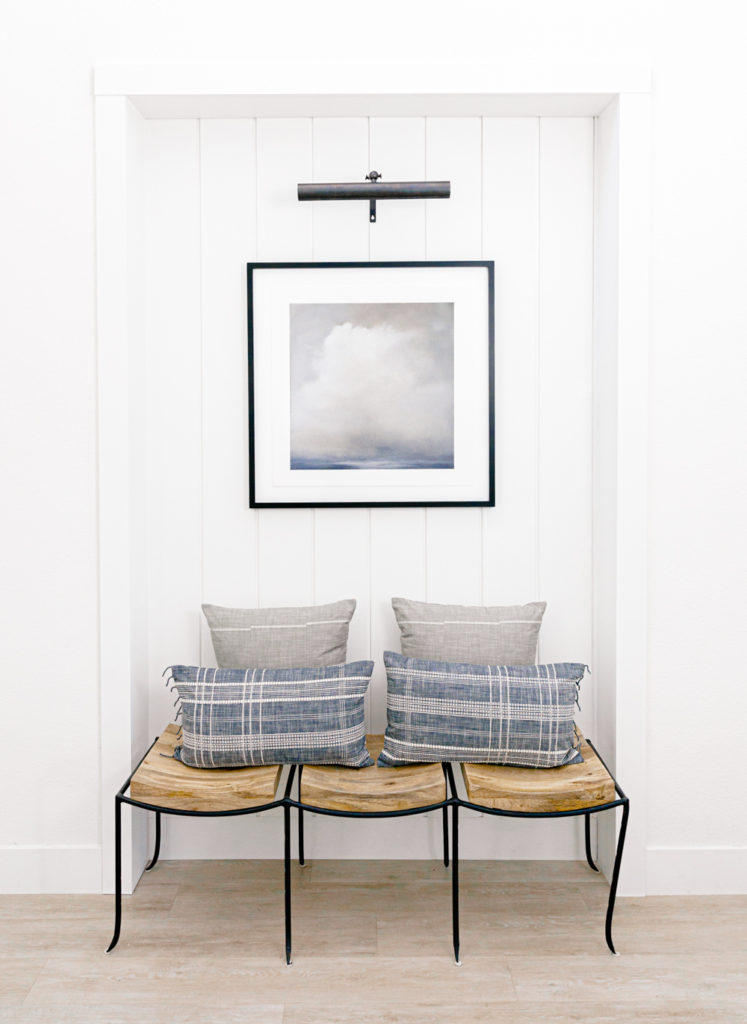


So much better right?!?!
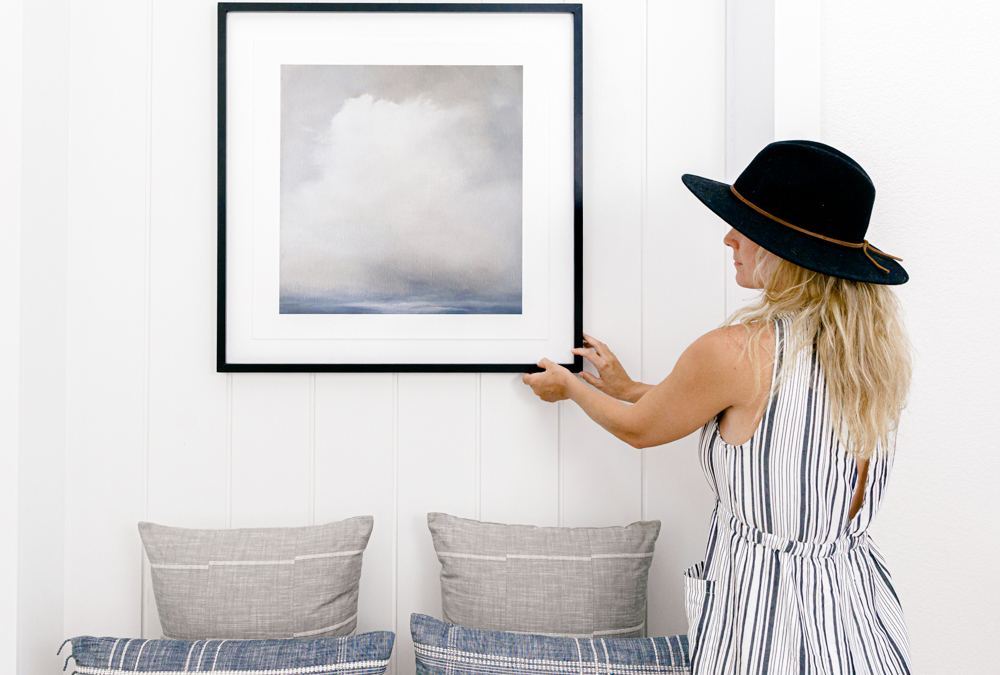
He did a great job! Now, I currently have him in the laundry room with you guessed it, more shiplap! But that will most likely be the end of the vertical shiplap chapter in our house, can’t go crazy. When Studio McGee came out with their 1st collection at Target, I saw these woven plaid pillows and bought up a TON! They are still available, hurry and shop below to get them! The woven textured stripe is sadly sold out! I wasn’t sure exactly where they were going to go, but I would find a place. They are the perfect addition to the wooden metal bench. And remember that light? There it is right above the Quiet Dawn Art Print from Minted. I love how all the blues flow together.
ABBY’S ENTRY WAY
xx
Abby